In this blog we are going to cover the points related to the usage of image component. The image component can be used to add logos, icons, images etc related to the data being displayed etc. This blog has been created with version 6.0 of Helical Insight Enterprise Edition in mind.
Note: As of now the image file types which are supported are JPEG, SVG, JPG and PNG only.
An image can be fetched directly from the URL (refer to Point l) or it can be uploaded in the Helical Insight file browser repository from where it can be used. Below the method of uploading an image is explained.
- Click on the Home Button present at the top left of the blue band.

- Click on File Browser present at the bottom left of the screen
- When clicked File Browser will open. You can create a New Folder by using the top right option in the opened File Browser.
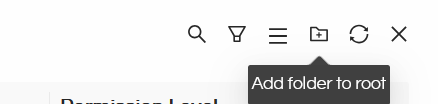
Any created folder can also have a subfolder, for that you can select any folder, right click on it and in the popup option you can use New Folder option.
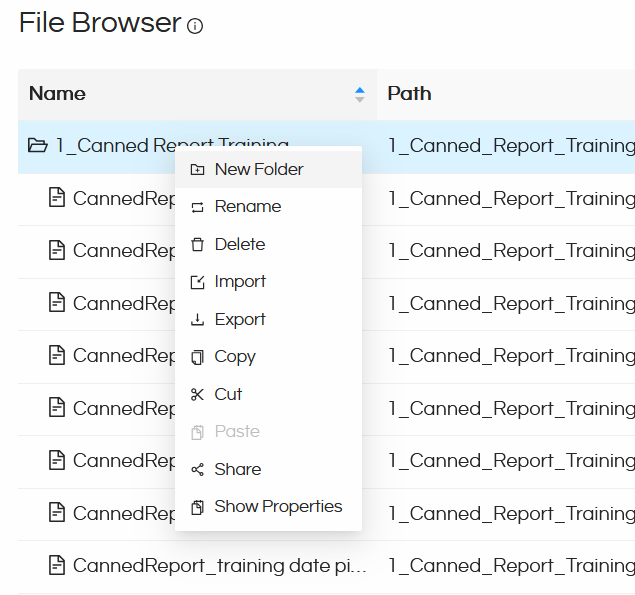
- In the created New Folder or subfolder, you can right click and you will get Import option.
- Clicking on Import will open a file browser allowing you to upload any file. Now select the image that you would like to import and use while designing the canned report.
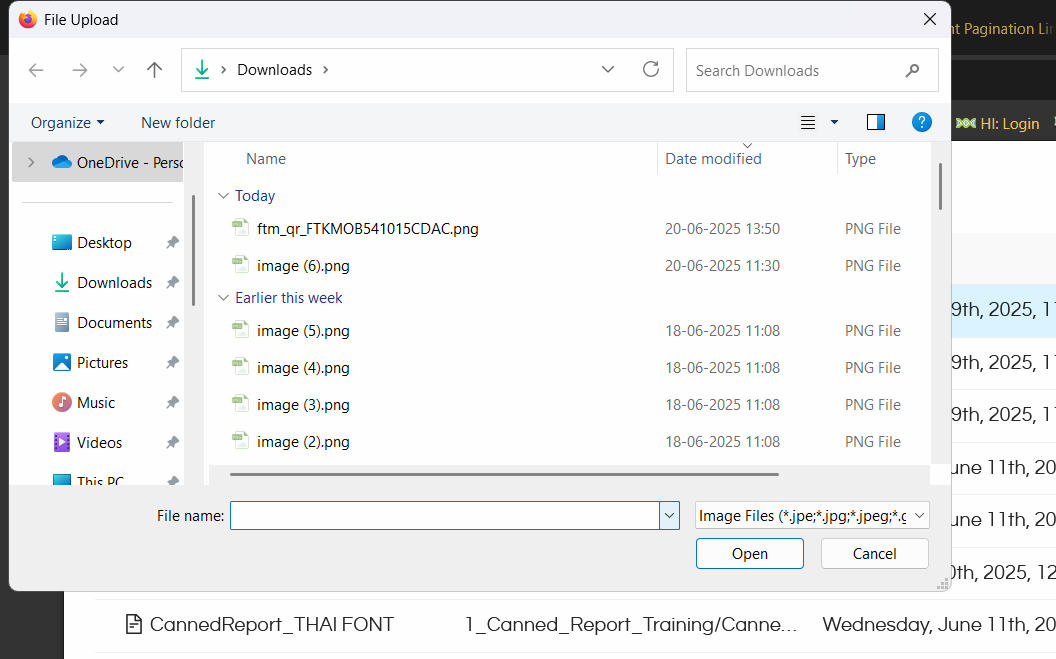
Once the image is imported it will show that notification message.
- Open Canned Report Module. Go to Canvas
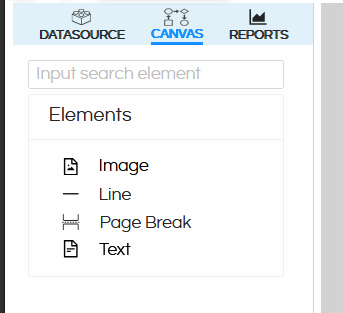
- Drag the Image component from the left side onto the Canvas
- You can click on the dragged image component, and on the right side in the Property Pane we can see a lot of that image related configuration options.
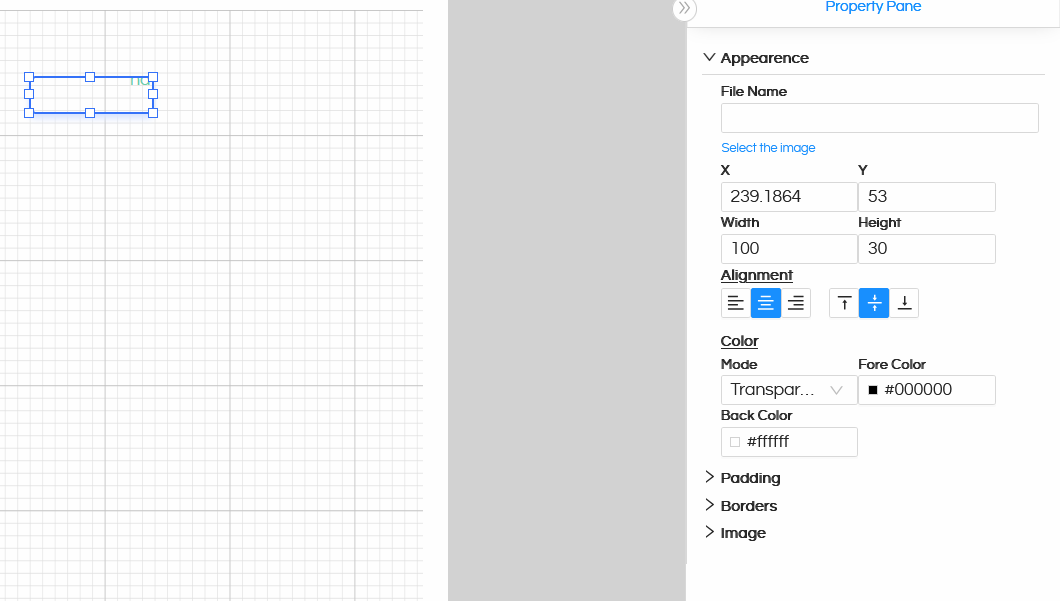
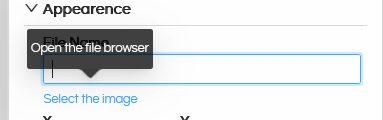
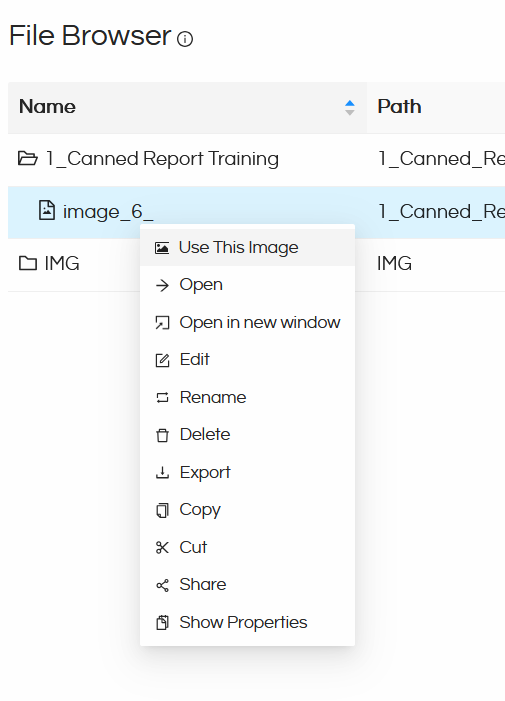
- Click on “Select the image” which will open the File Browser.
- Navigate to the respective Folder where you have uploaded the file. Select it, right click on it and use the option “Use this Image”
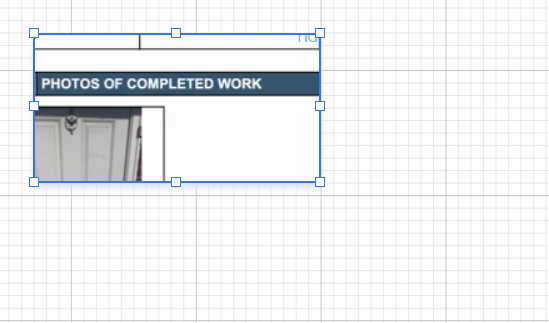
- Image will get added as shown.
- Alternatively, it is also possible to directly provide the image URL in the placeholder field
(e.g. https://www.helicalinsight.com/wp-content/uploads/2022/08/helical-insight-logo-1-2.png).
Now in the below steps we have covered how to use image component in the canned reports.
Further, Property options can be used which are explained below.
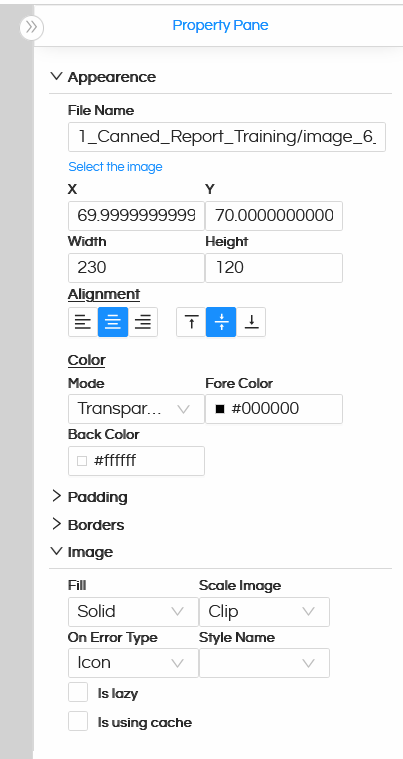
- XY coordinates and Height Width: You can define the X and Y coordinates and the height and width of the image. Please note that the height and width of the image should be equal for proper rendering.
- Alignment: If the scale type for the image is Clip or RetainShape and the actual image is smaller than its defined size in the report template or does not have the same proportions, the image might not occupy all the space allocated to it in the report template. In these conditions the image can be both horizontally and vertically aligned within its report element. Two attributes are responsible for the image alignment:
- Vertical – specifies the vertical alignment. Possible values are: Top, Middle, Bottom
- Horizontal – specifies the horizontal alignment. Possible values are: Left, Center, Right.
- Padding: Defines the padding between the container and the element. You can define the top, bottom, right and left padding
- Border: Top, bottom, left and right border style, weight and type for the image can be defined.
- Image: When clicked and expanded, Image category has got the below list of sub options.
- Evaluation Time – Specify the moment when the image expression gets evaluated. The image expression can be processed at the end of present band or page, group, report, column, specific band etc.
- Eval Group – Select the group based on which the evaluation time will be processed. This is used when the Evaluation Time is set to Group
- Style Name – Used when styles have been defined using Page Properties.
- Fill – Fill type of the image background – Solid is the default.
- Scale Image – indicates how should be rendered the image when its actual size does not fit the size of the image report element. This is because in a lot of situations images are loaded at runtime and there is no way to know their exact size when creating the report template. Possible values for this attribute are:
- Clip – if the actual image is larger than the image element size, it will be cut off so that it keeps its original resolution, and only the region that fits the specified size will be displayed.
- FillFrame – if the dimensions of the actual image do not fit those specified for the image element that displays it, the image is forced to obey them and stretch itself so that it fits in the designated output area. It will be deformed if necessary.
- RetainShape – if the actual image does not fit into the image element, it can be adapted to those dimensions while keeping its original undeformed proportions.
- RealHeight – the image actual height is kept intact, while the height of the container will change based on the actual image height.
- RealSize – the image actual height and width is kept intact, while the size of the container will change based on the actual image size.
- On Error Type: Defines what should be displayed if there is error in rendering the image
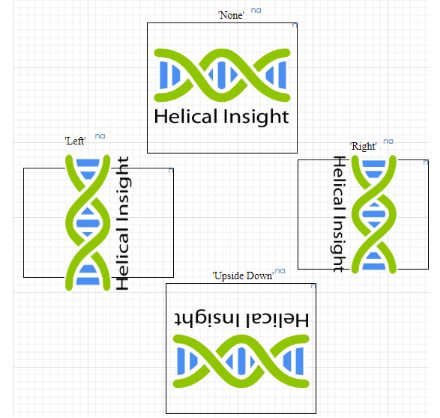
- Rotation: Defines the rotation of the image on loading.
- Position: Position of the image origin
- Stretch: In case of image overflow, how the container or element should be stretched.
Others:
- Print Repeated Values: Prints values that are repeated
- Remove Line when Blank: If the image is blank, then no line should be printed.
- Is Lazy – This option controls when an image is loaded and rendered during report generation. When Is Lazy = False, the image is loaded along with the report.
Is Lazy = True, the image is loaded only when it is actually needed. This is recommended for optimal performance when the image size is big. - Is Using Cache – flag that indicates if an image should be loaded each time it gets displayed in a report, or if it should be loaded only once and then stored in a memory cache for better performance. For images with static content applying the caching mechanism is strongly recommended. When one set the isUsingCache attribute to true, the reporting engine will try to recognize previously loaded images using their specified source
Please reach out to support@helicalinsight.com in case of any other questions.
