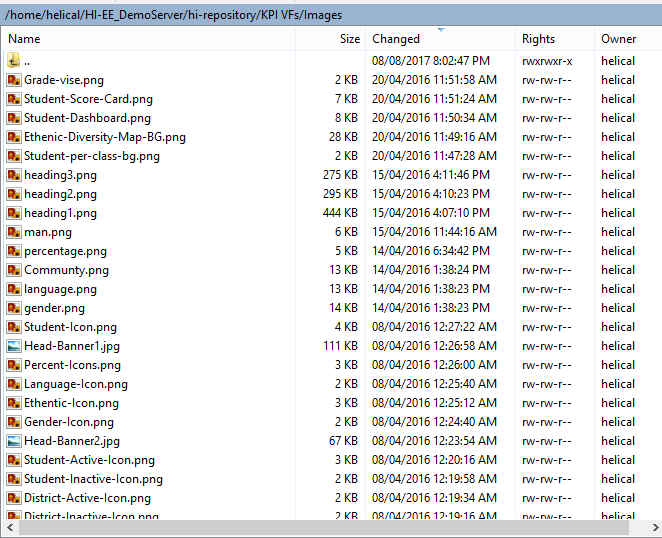
In this article you will learn about how to add image in Adhoc.
Primarily, in adhoc reports images can be used in various ways like Background, for logo purpose, dashboard panel and so on. Also, various image format it supports like GIF, TIF, JPG, PNG and other.
In Adhoc, there are 2 ways we can use image :
- Through Custom Scripts
- Through Custom Styles
Adding Image through Custom Scripts
Following are the steps to add image through custom scripts :
- Select the desired image of any file format like .png, .jpg and so on.
- Select the desired location on server in which images will be saved.

- Go to Adhoc, then click on Editor.
- In JS Editor, you need to write a custom scripts in which add image path inside script.
Javascript Code
var image = document.createElement('img'); image.className = 'student-image'; image.id = 'student-image'; image.src = window.DashboardGlobals.baseUrl +'/getExternalResource.html?path=KPI VFs/Images/Student-Icon.png'; //path may change based on image location image.appendChild(document.createElement('br')); cardDiv.appendChild(image); - After updating the script and on clicking generate report, as an output a image is displayed in adhoc report.

Adding Image through Custom Styles
Through custom styles image of any file format like .png, .jpg etc need can accessed from the server or from the other internet sources like picasa, google images etc.
Following are the steps to be followed in executing the custom style :
- Go to Adhoc
- In Editor Tab, Click CSS Editor then paste the code
CSS Code
#chart{ padding-top:7px; background: url('/getExternalResource.html?path=KPI VFs/Images/Student-Icon.png'); } - After applying the CSS and clicking generate report, a image will be displayed inside the adhoc report.

For More Info, Contact us at demo@helicalinsight.com
