Open Source BI Helical Insight has reintroduced canned reporting module from version 6.0 onwards. We have already covered how canned reports can be created. Once a report is created, it is very important that people get to see their own dataset only.
Introduction: In this blog, we are going to explain how to implement data security based on the user’s profile attributes. A user can have multiple profiles and each profile can have multiple profile values. Profile attribute and profile values can be assigned from the Helical Insight user role management UI, or it can also be assigned via SSO also. You can read about the user role management here
.
In this example, data is filtered based on user profile attributes. If a user has no profile, they will see all the data. If the profile attribute is ‘Destination’ the data will be filtered based on the profile values assigned to this profile name called Destination.
Please make sure you have gone through the blog “Introduction to Canned Reporting Interface“.
In Canned Report 6.0, data security can be implemented using two approaches: Groovy Managed Connection and Groovy Plain JDBC Connection. In this documentation, we will focus on Groovy Managed Connection, as it is the recommended approach.
Steps to implement Data Security :
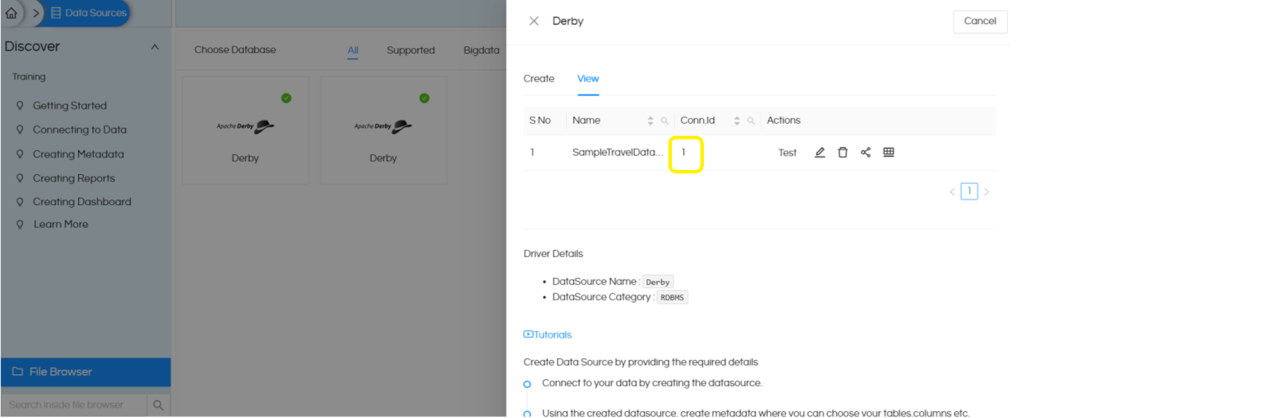
1. Create a data source connection using the data sources module. Once you have created a datasource, it will dynamically create a connectionId (like show in the below image). Read more about creating datasource here.
https://www.helicalinsight.com/adhoc-datasource/
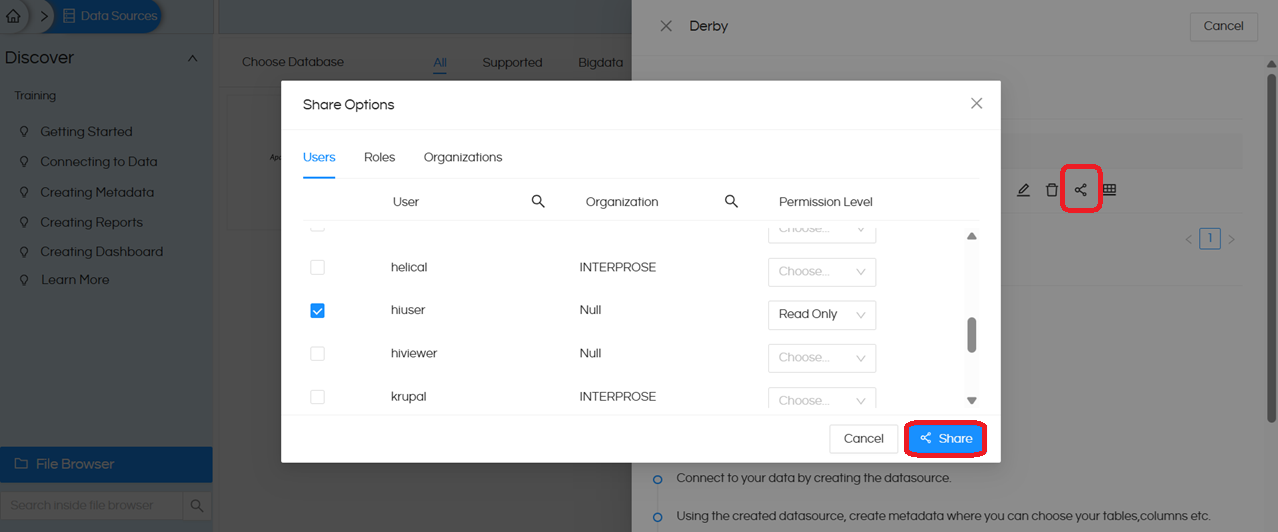
In our use case, we created a Derby connection, and the connection ID is 1
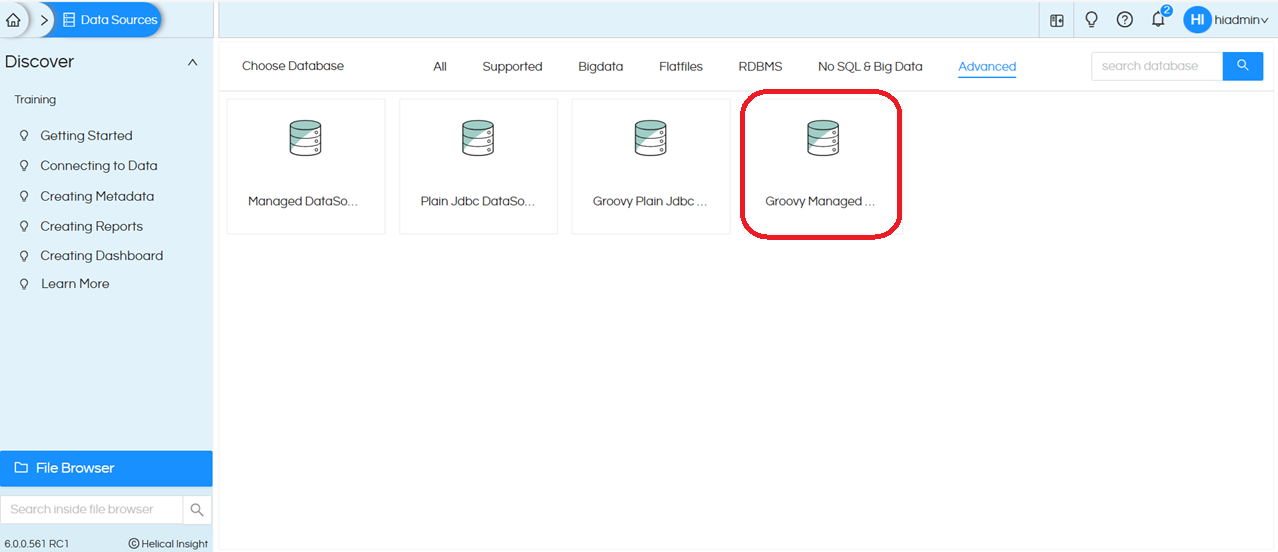
2. Next we need to create a Groovy Managed Connection. For that, go to the Data Source page, open the Advanced section, and choose Groovy Managed JDBC DataSource. Refer to the screenshot below
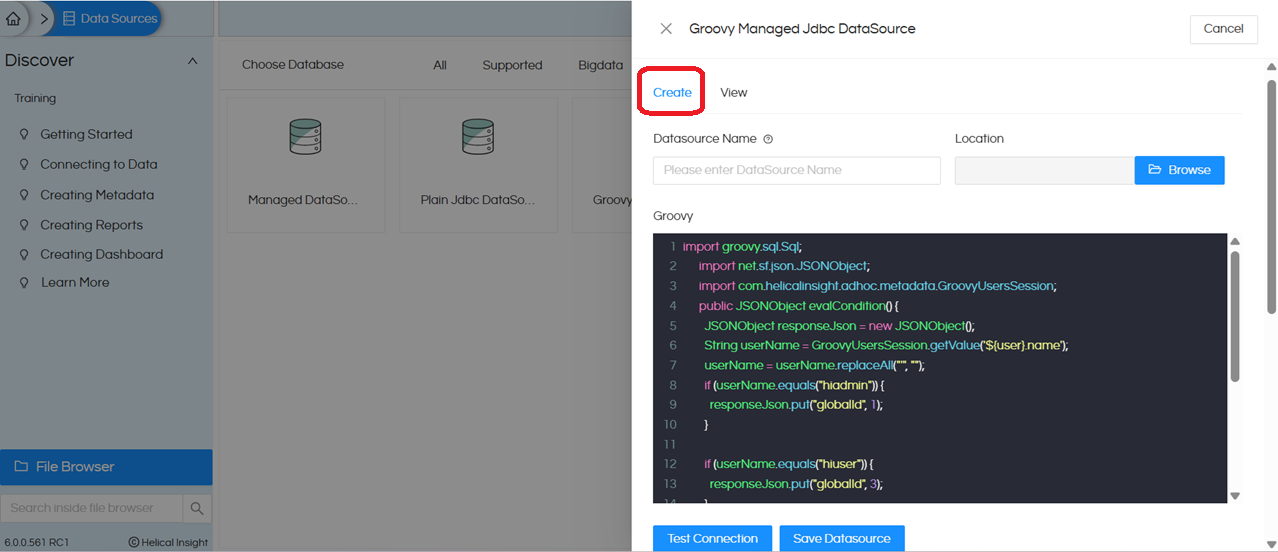
Click on Create. This opens the UI displaying the following fields: Datasource Name, Location, and a Groovy placeholder. The Groovy placeholder comes with some default code provided as a reference
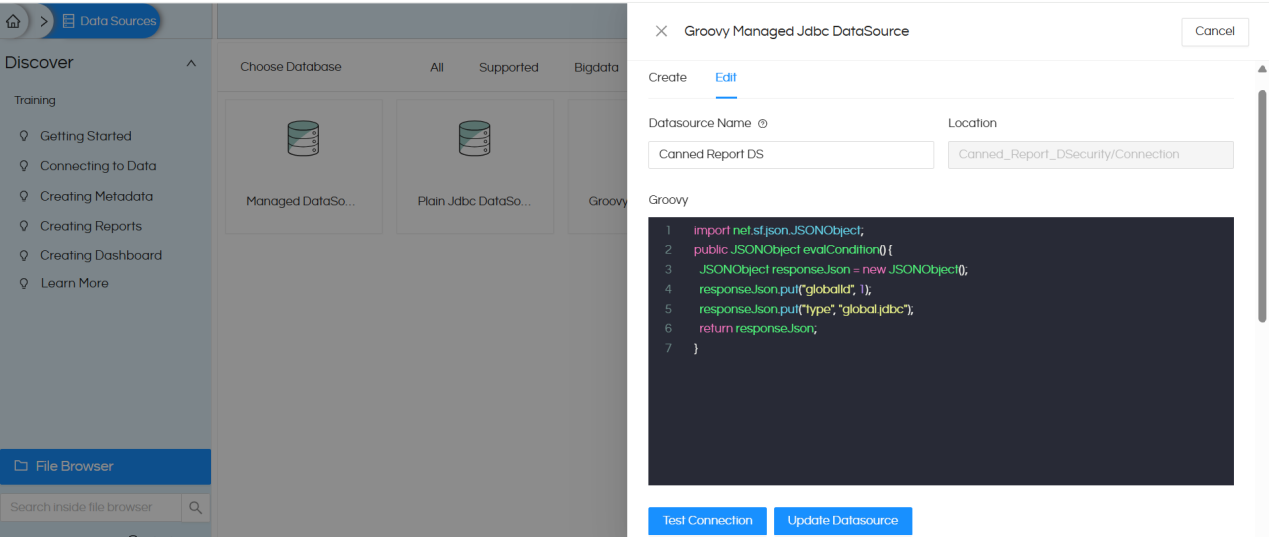
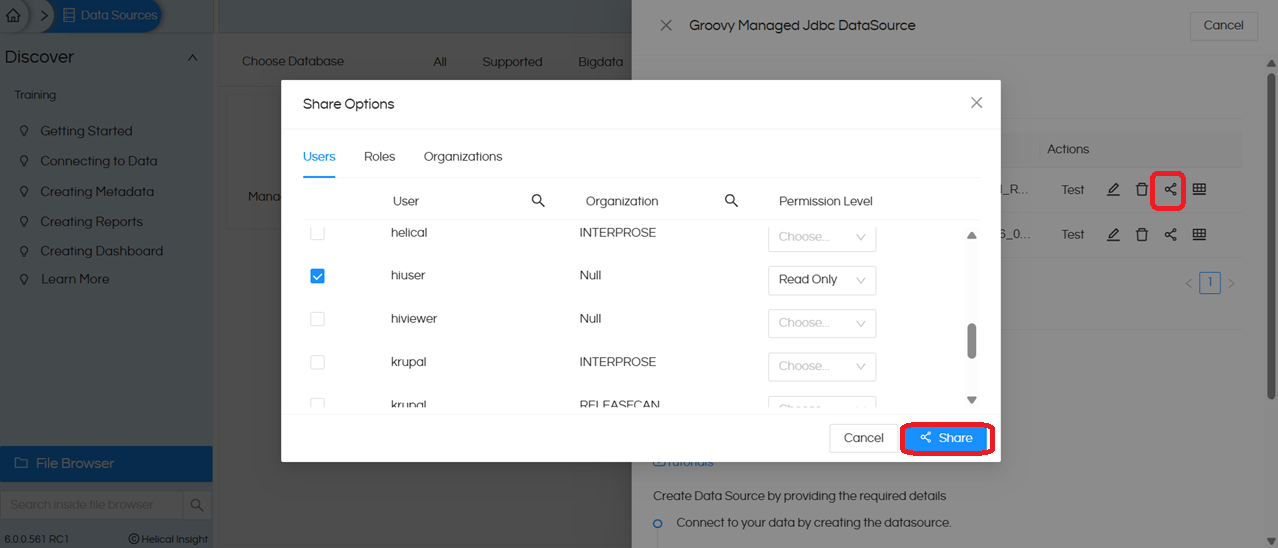
We created a Groovy connection with the datasource name Canned Report DS, provided the code below, and then saved the connection
 import net.sf.json.JSONObject;
      public JSONObject evalCondition() {
        JSONObject responseJson = new JSONObject();
	    responseJson.put("globalId", 1);   // we should use the connection ID from step1
        responseJson.put("type", "global.jdbc");
        return responseJson;
      }
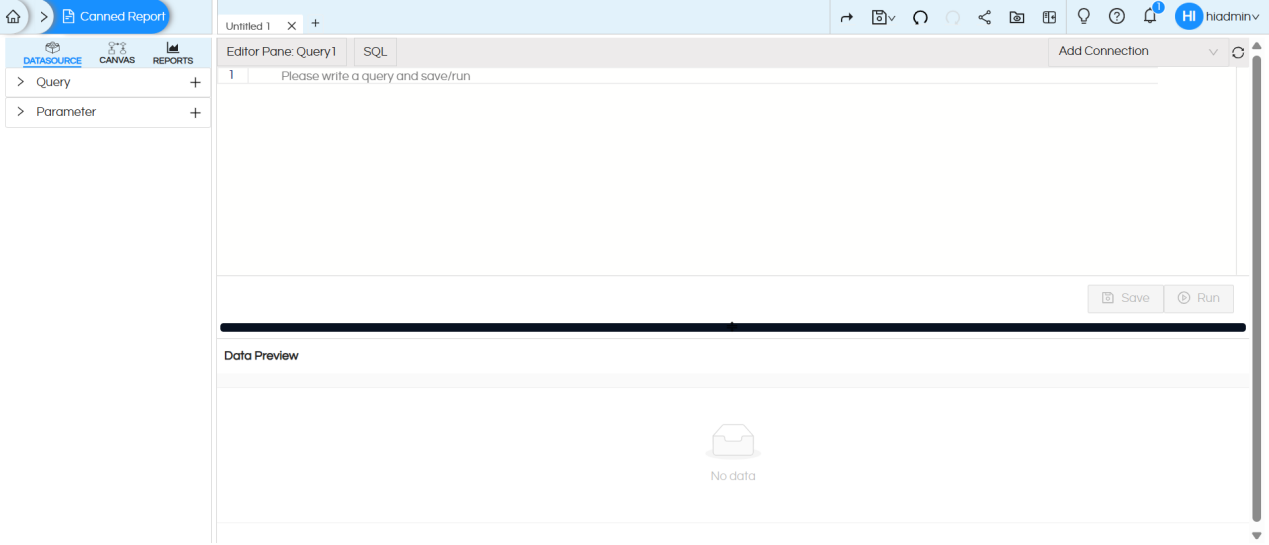
3. Open the Canned Report module. By default, it opens as shown below.
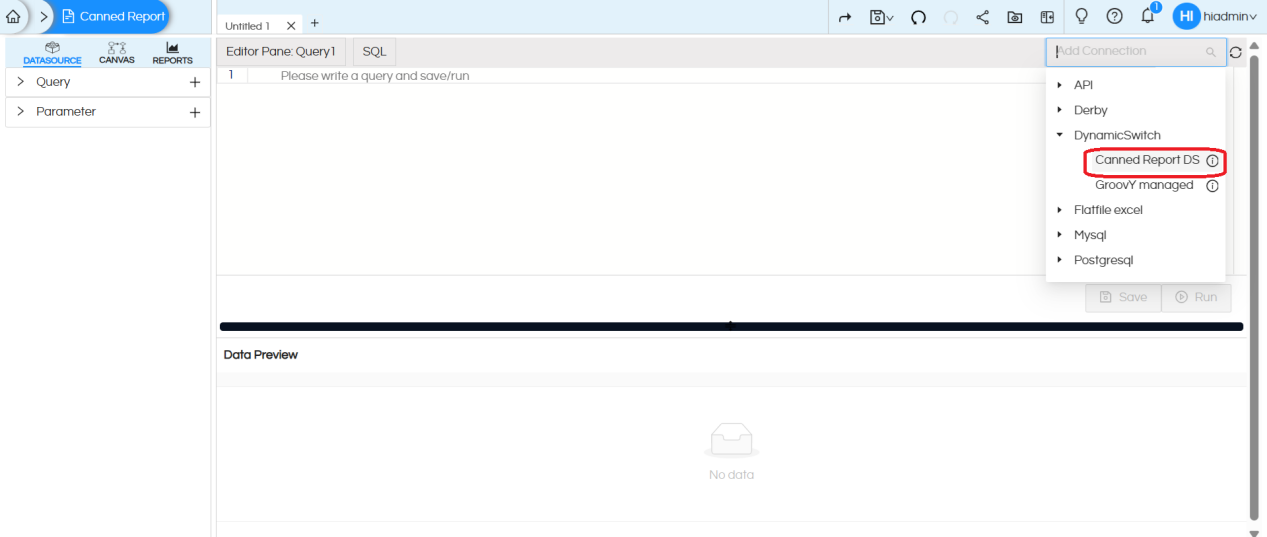
Click on Add Connection and select our Groovy Managed connection. Here, we selected Canned ReportDS.
Once we select the Groovy connection, the SQL type changes to Groovy. Now provide the code below in the Groovy SQL placeholder.

import com.helicalinsight.efw.utility.GroovyUsersSession;

public String evalCondition() {

    String profileName = GroovyUsersSession.getValue('${profile}.name');
    profileName = profileName.replaceAll("'", "");

    String responseJson;

    String selectClause = """SELECT "travel_type", "travel_medium", "source", "destination", "travel_cost" FROM "travel_details"""";

    String whereClause = "";

    if (profileName.equals("Destination")) {
        String profileValues = GroovyUsersSession.getValue('${profile[\'Destination\']}');
        profileValues = profileValues.replaceAll("'", "").trim();

        if (!profileValues.isEmpty()) {
            // Split by comma and wrap each value in quotes
            def valuesList = profileValues.split(",").collect { "'${it.trim()}'" }
            whereClause = " WHERE \"destination\" IN (${valuesList.join(',')})"
        }
    }

    responseJson = selectClause + whereClause;

    return responseJson;
}
Code Explanation: This logic controls data access based on the logged-in user’s profile attributes. If a user has no profile assigned to him, they will see all the data as the base query will run. Otherwise, if the logged in user is having a profile assigned to him, then this code will fetch all the profile values assigned to that profile attributed and pass that as multiselect in the where condition. Thus resulting in filtered out data.
This Groovy code is very similar to Java. More and more complex conditions can also be put which can check multiple conditions and values like user name, organization name, role, profiles etc.
After entering the Groovy SQL, click Save and then Run. This will return the query response.
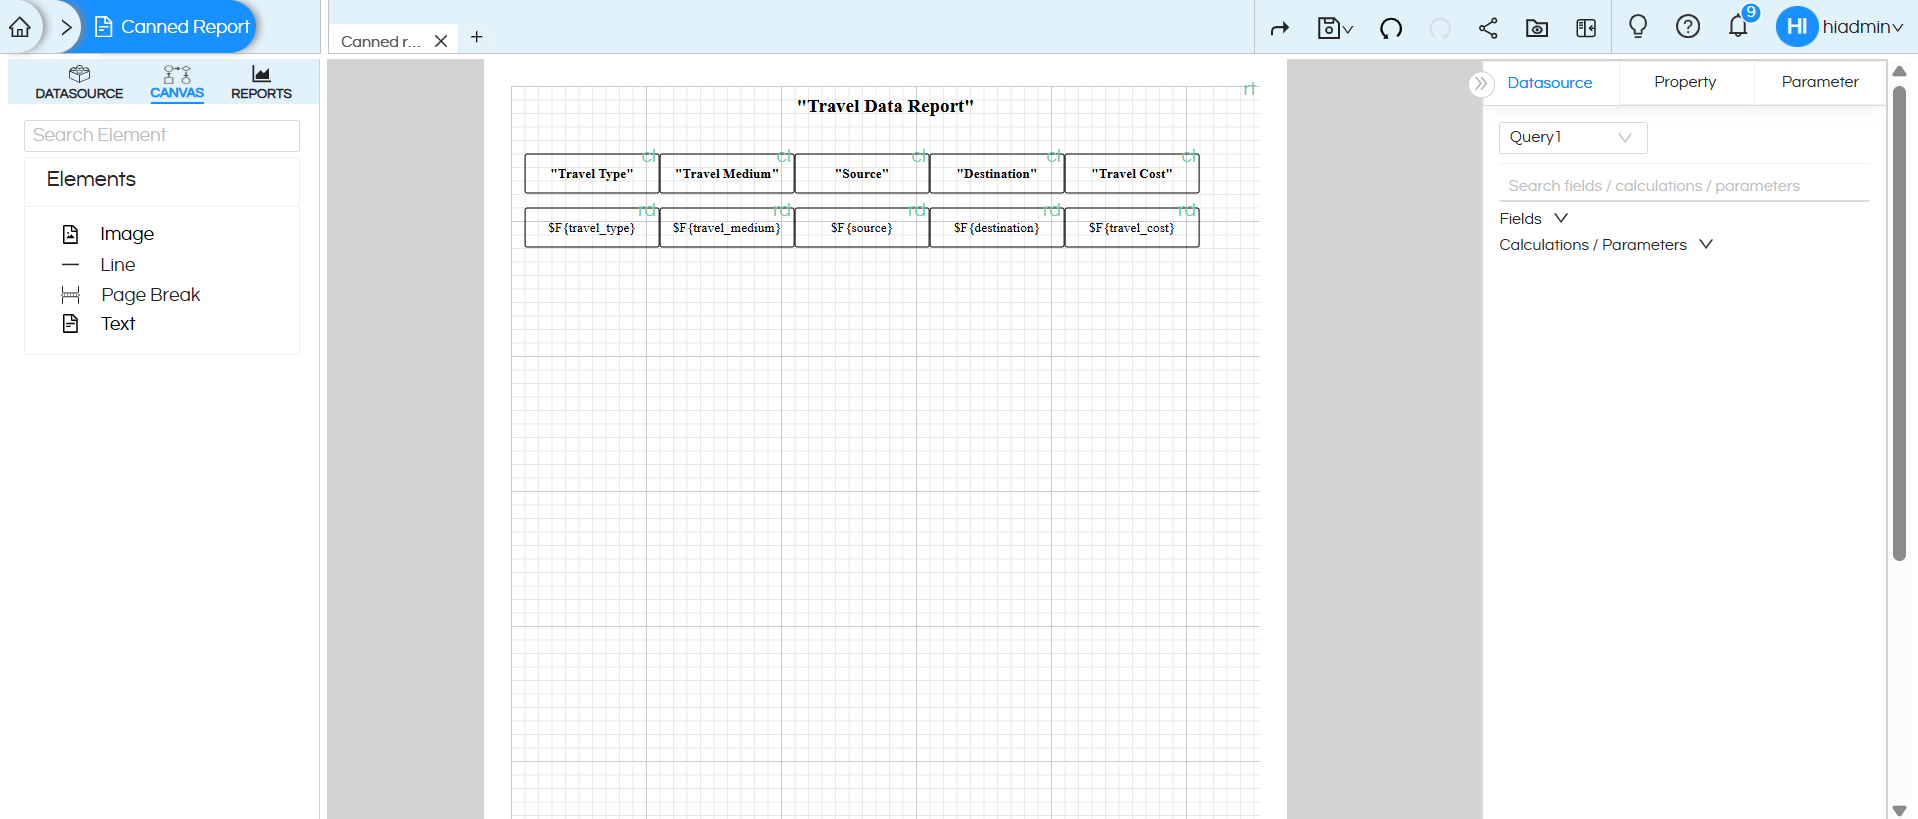
4. Now go to the Canvas, create the report, and then save it..
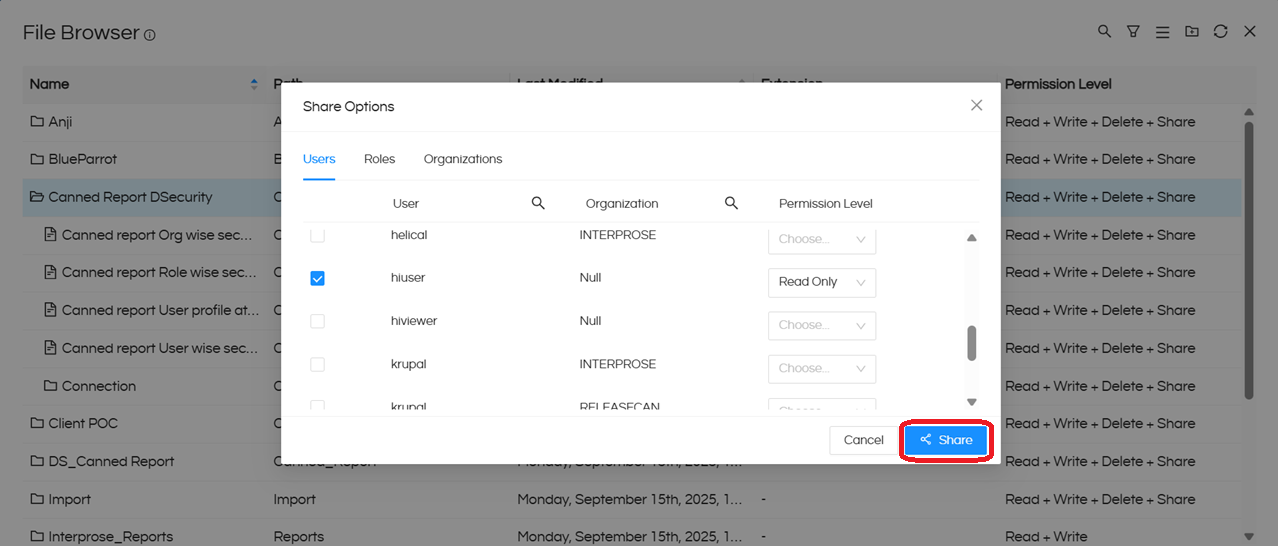
5. We saved the report and the Groovy connection in the same folder which makes it easy to share.
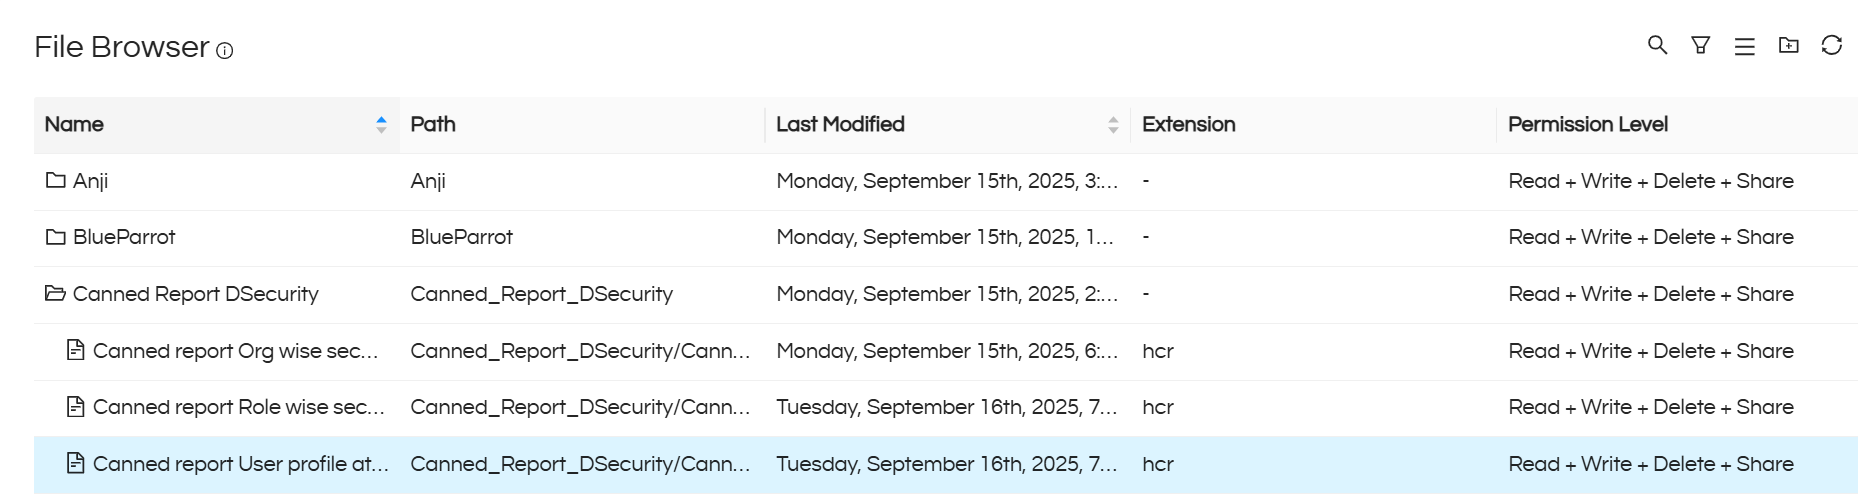
6 . Now share the data source connection, Groovy Managed Connection, and report folder with the user you want to provide access to, with appropriate permissions. In this example, we shared them with hiuser, demouser2 (In the screenshot, it is visible only for hiuser, we have shared it with demo user also)
To read more about sharing you can read here https://www.helicalinsight.com/sharing-reports/
If you have saved the Groovy Connection in a different folder, please make sure that you share all the respective resources and folders properly.
Report view test case 1 :
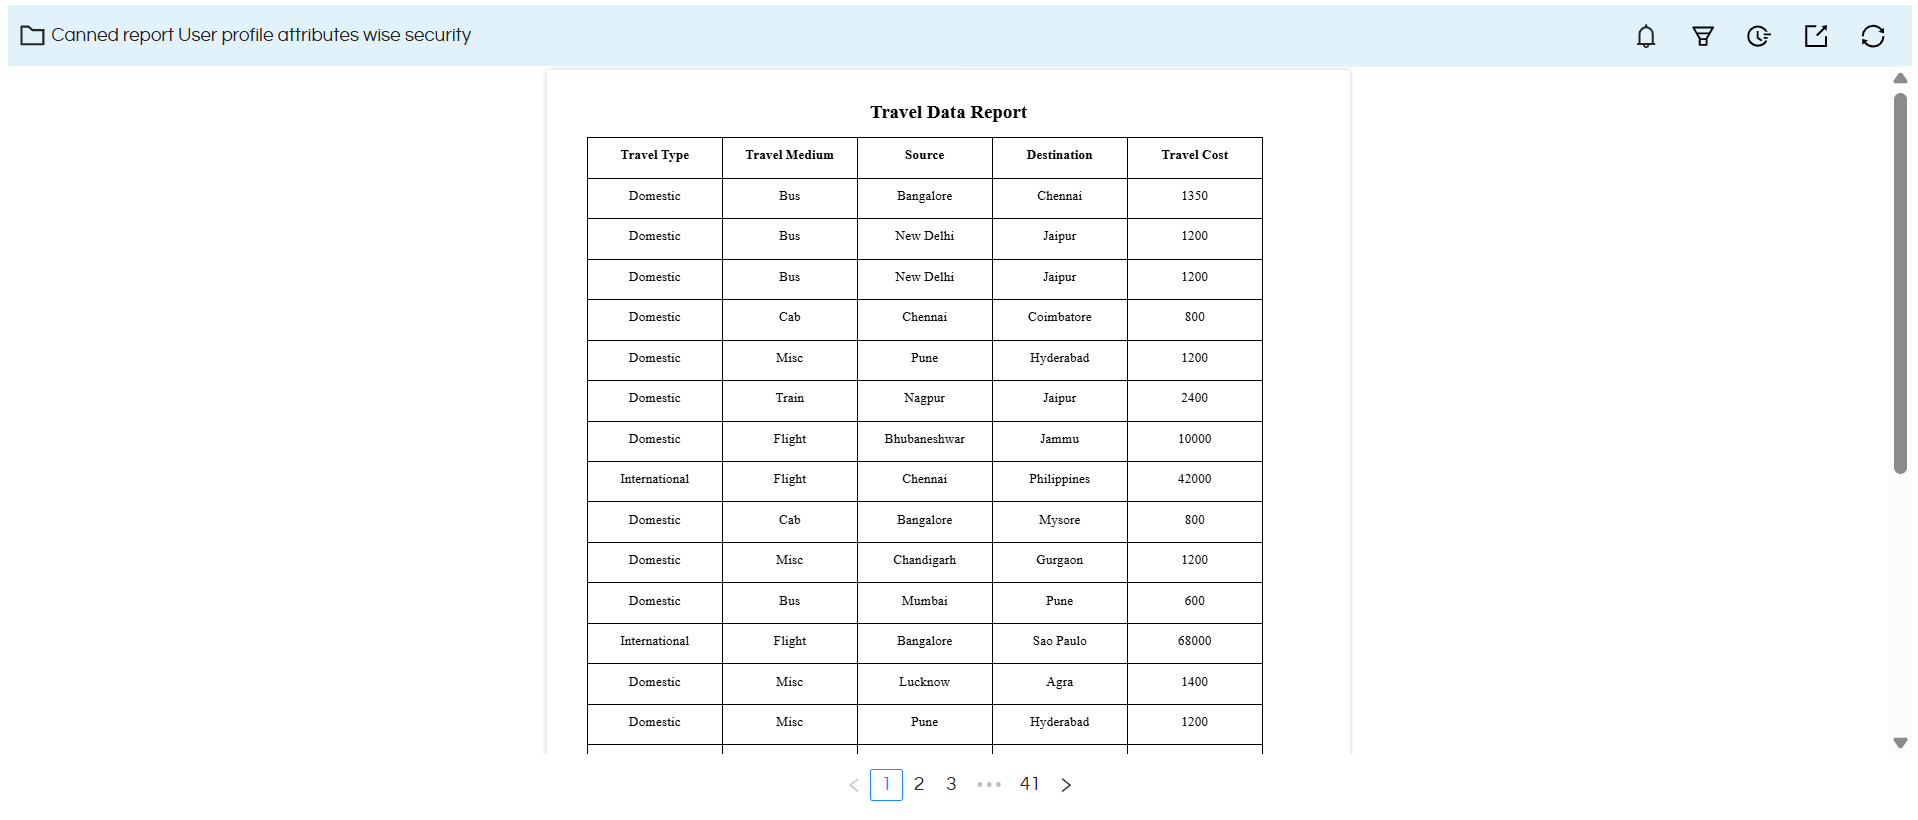
Report view when we logged in with USER : hiadmin having no profile assigned to him.
Note: This user can view all the travel data
Report view test case 2 :
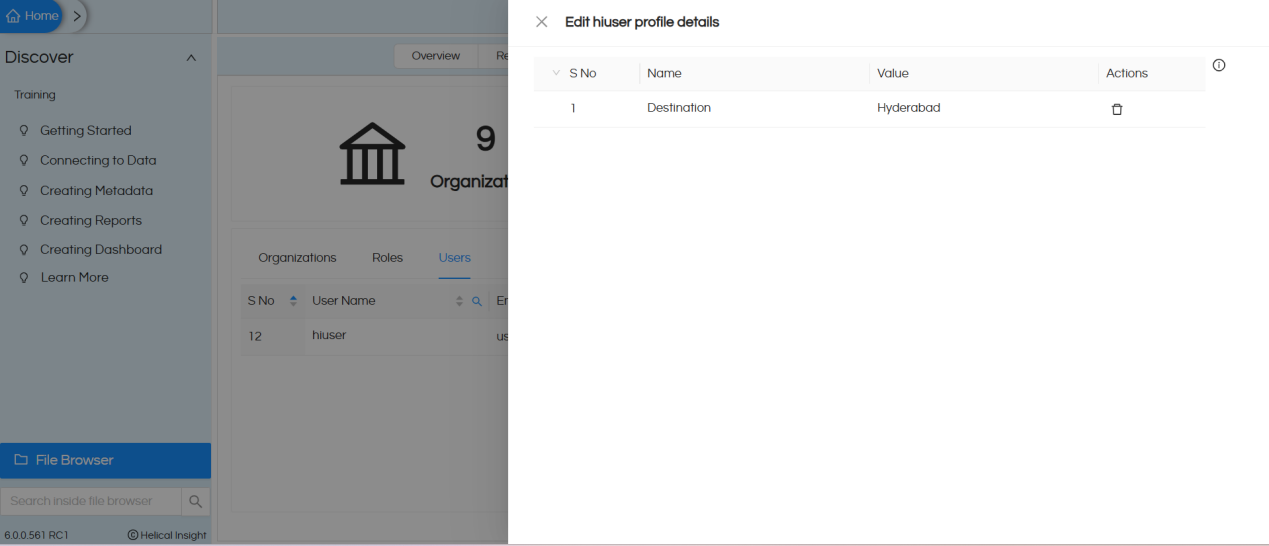
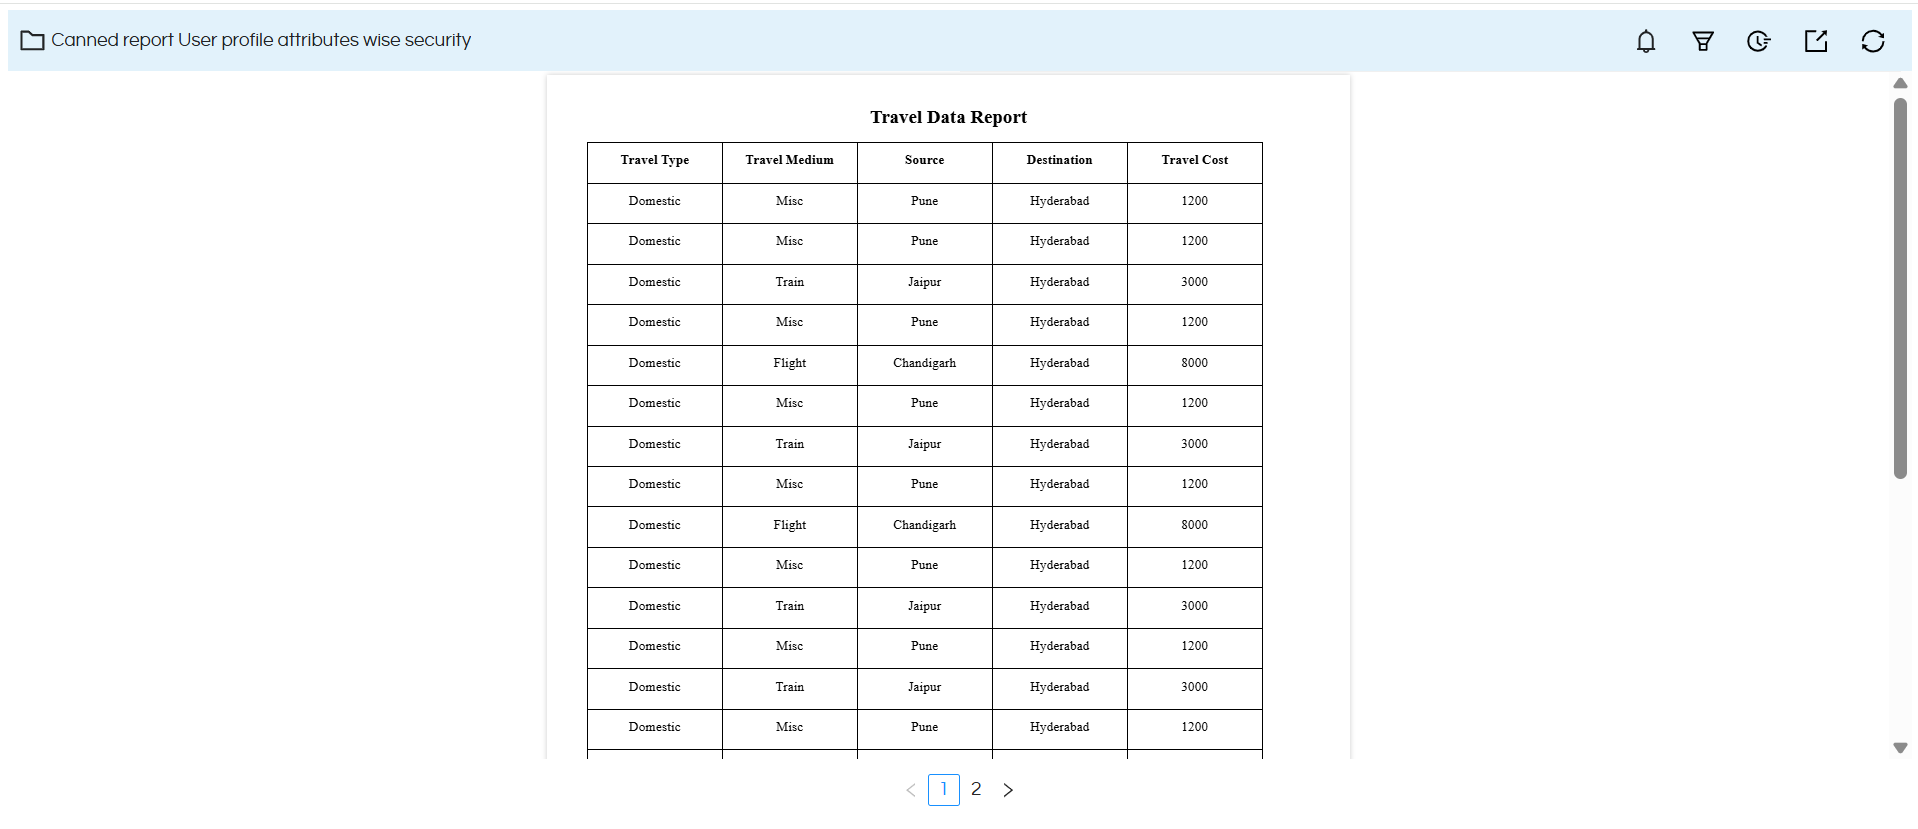
Report view when we logged in with USER: hiuser, having profile name: Destination and profile value: Hyderabad.
Note: This user can view only the travel data for the destination Hyderabad
Report view test case 3 :
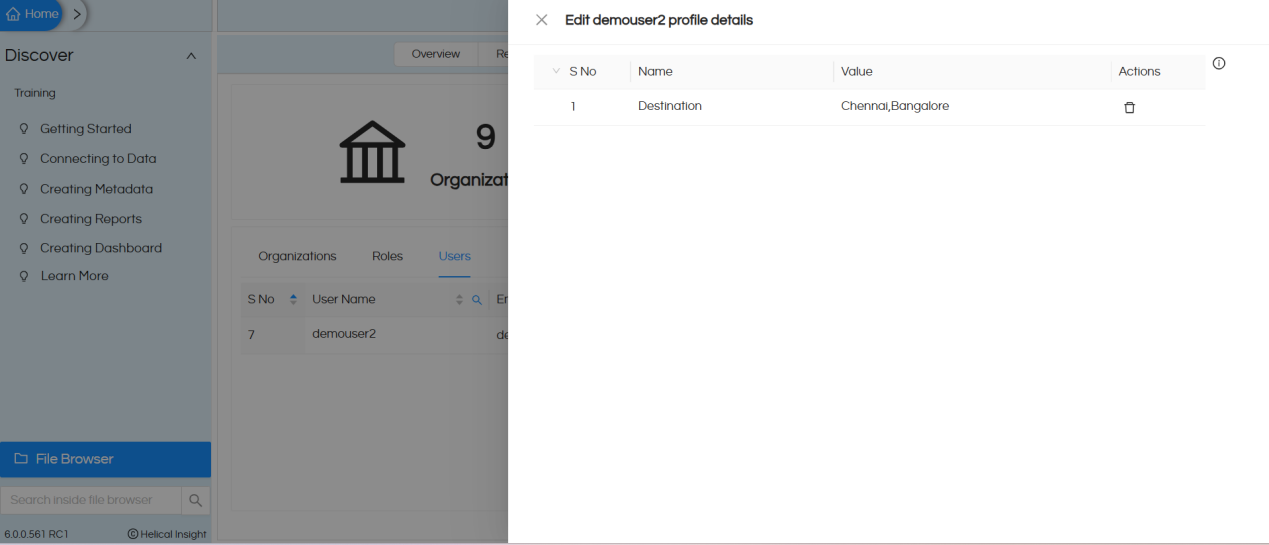
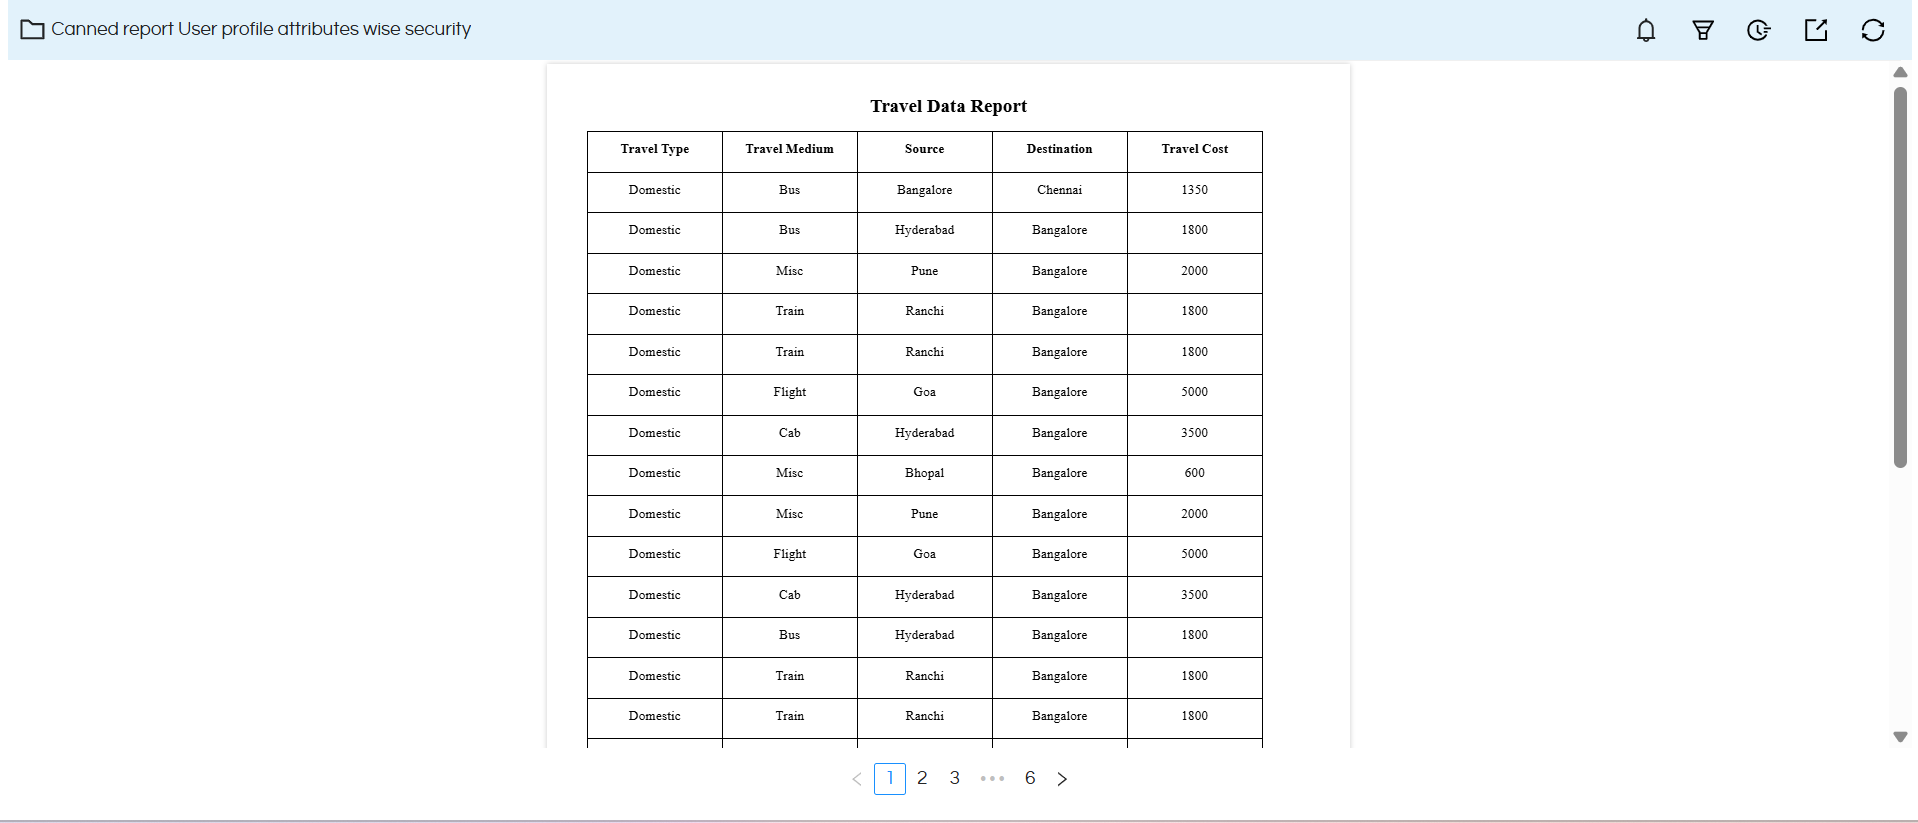
Report view when we logged in with USER: demouser2, having profile name: Destination and multiple profile values i.e. Chennai,Bangalore
Note: This user can view only the travel data for the destination Chennai and Bangalore.
Please reach out to support@helicalinsight.com in case of any more questions.
