In this blog we are going to cover how to create a canned report with a date range picker as an input parameter/filter.
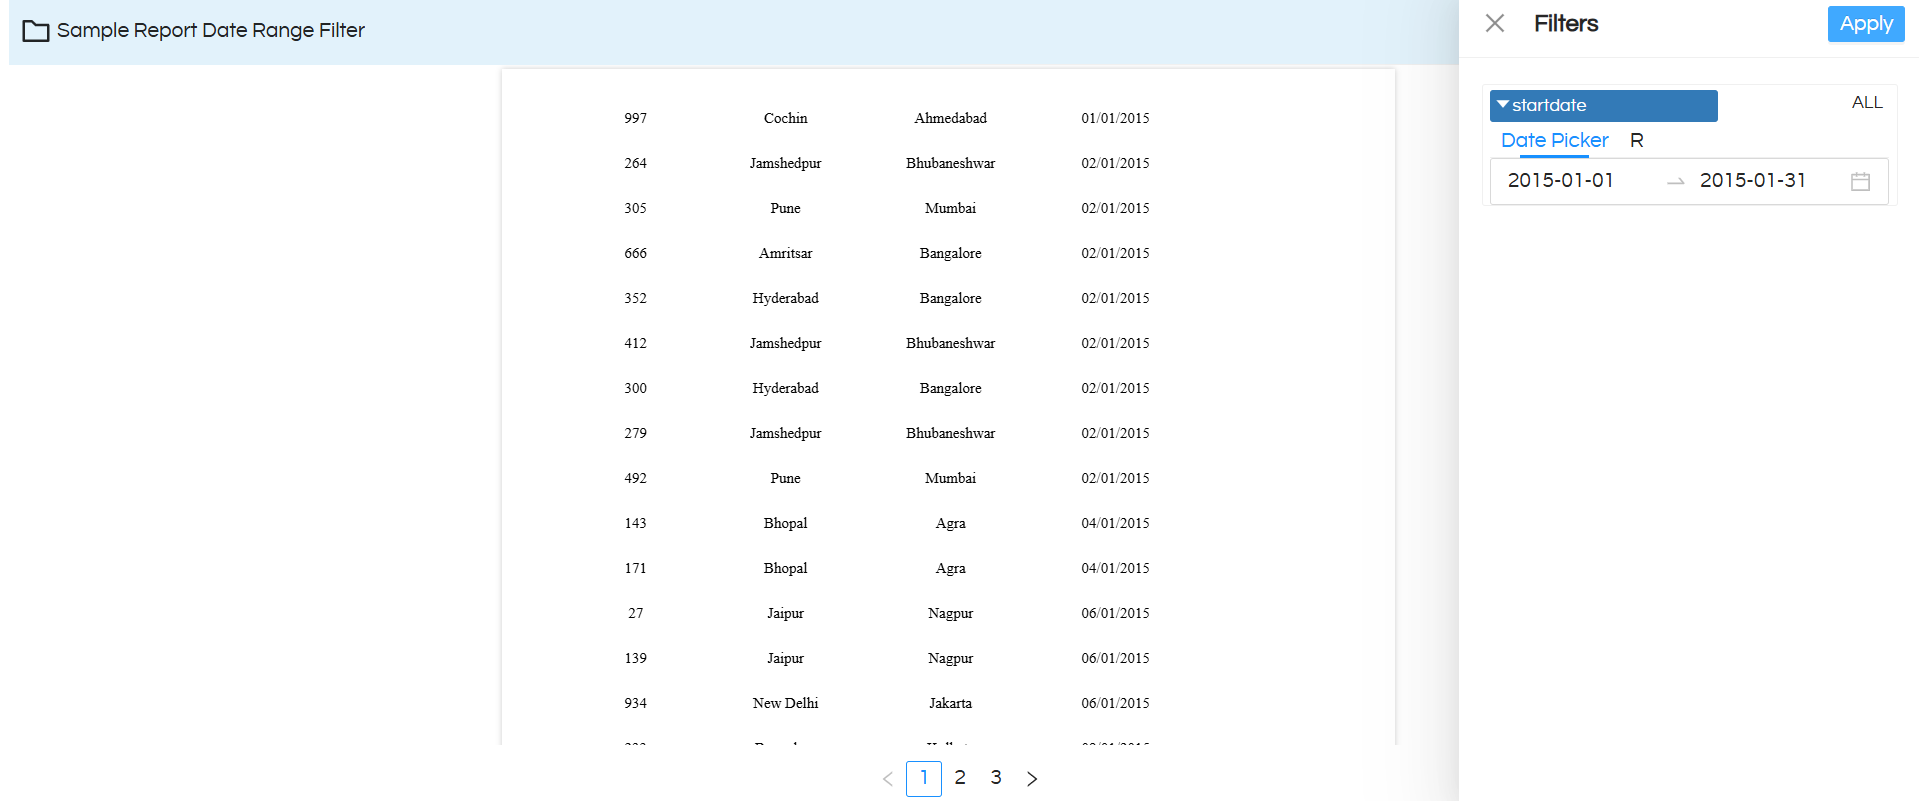
When an end user will interact with this report, he can see a date range picker option, selecting which accordingly the report data can get changed.
This blog is relevant for the canned reporting module of Open Source BI product Helical Insight version 6.0 onwards.
Steps to report with date range parameter in a Helical Insight canned report :
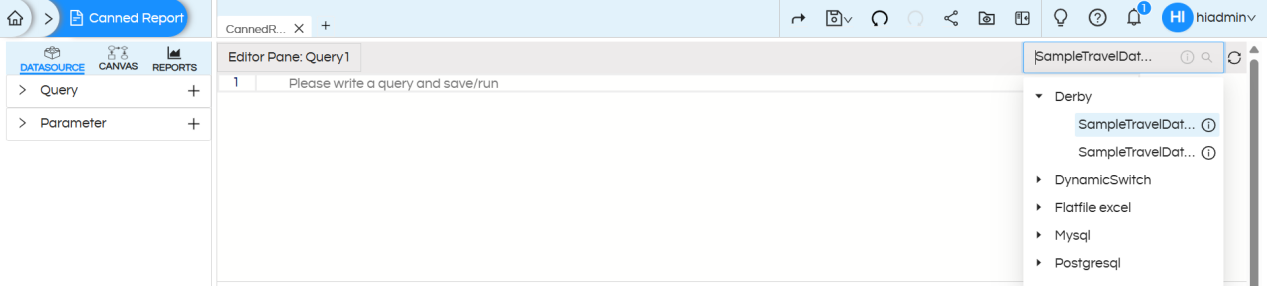
STEP 1: Go to Datasource and select the desired connection.
Read more here about how to connect to datasources. You can write the SQLQuery here and drag drop the required fields to create the report.
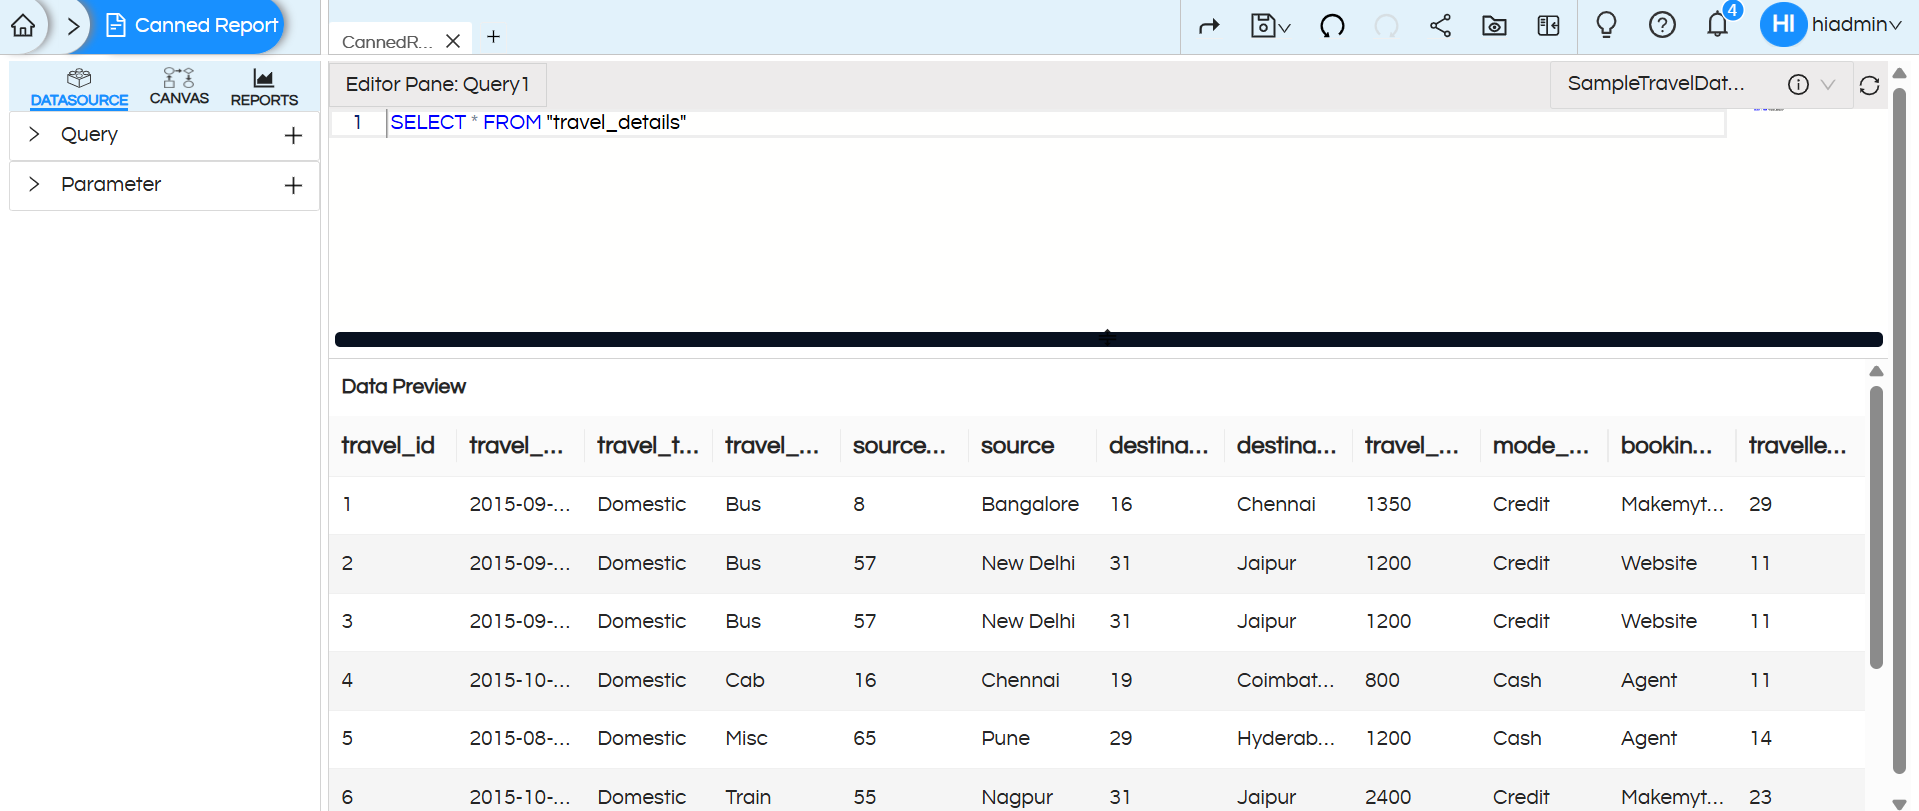
STEP 2: Write the required SQL for the report creation here. No need to put the where clause right now.
Report SQL :
select
	"HIUSER"."travel_details"."travel_id" as "ID",
 	"HIUSER"."travel_details"."destination" as "Destination",
 	"HIUSER"."travel_details"."source" as "Source",
 	"HIUSER"."travel_details"."travel_cost" as "Cost",
 	"HIUSER"."travel_details"."travel_date" as "Date",
 	"HIUSER"."travel_details"."travel_medium" as "travel_medium"
from
	"HIUSER"."travel_details"
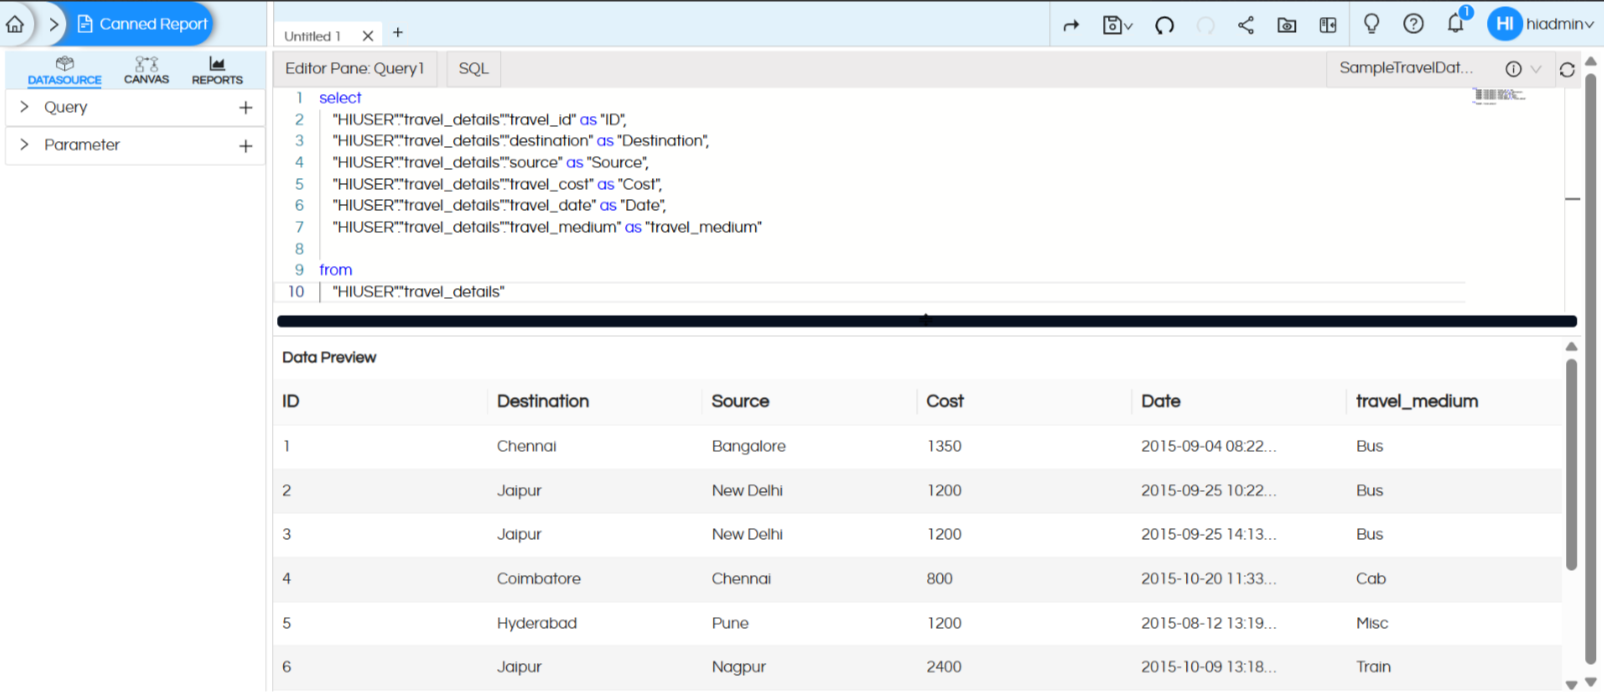
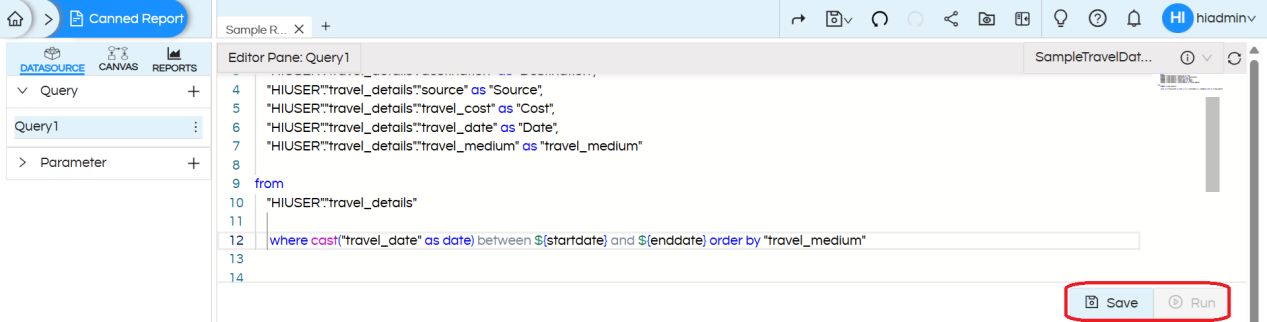
STEP 3: After providing the SQL query, click on Save and then Run.
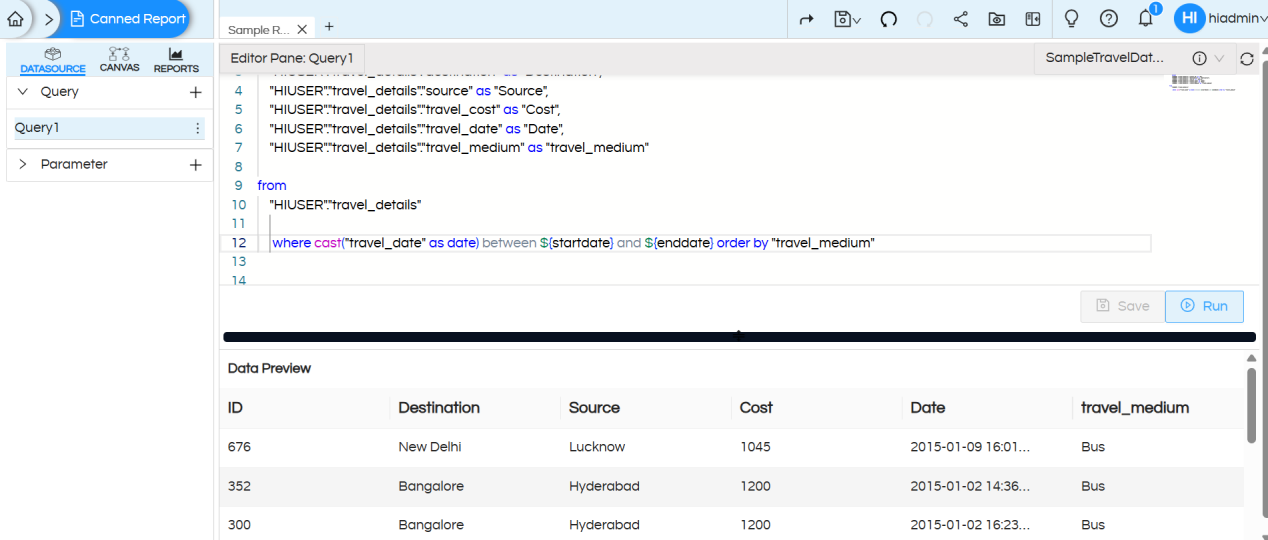
You will see the first 10 records of the resultset.
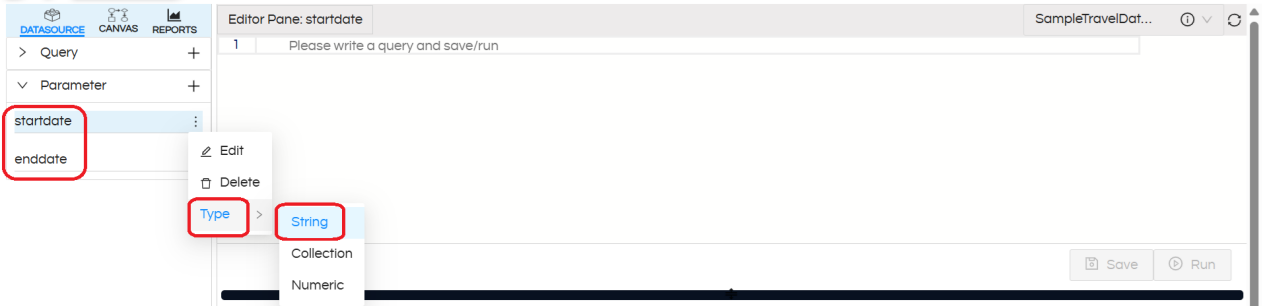
STEP 4: Add an input parameter
In the Datasource page itself, click on Parameter section, click on the + (plus) symbol to add a parameter. Each time you click, it adds a new parameter named parameter1, parameter2, parameter3, and so on.
On the right corner of its name, you can also see three dots, which give the following options:
- Edit — You can rename the parameter from parameter1 to your choice of name.
- Delete — You can delete the parameter.
- Type — You can choose the parameter type:
- a. String: Accepts text input for filtering or searching dimensions (e.g., customer name = “John”).
- b. Collection: Allows selecting multiple values from a list to slice or filter data (e.g., regions = [East, West]).
- c. Numeric: Accepts numbers to filter or calculate measures (e.g., sales > 1000).
In this case we will add two input parameters i.e. one startdate and the second is enddate.
For dates the type of input parameter is “String”. In cases of date picker / date range picker there is no need of writing SQL.
STEP 5: Add where clause to the main report query
Earlier in Step 2 we had written a main report query. Now we will add where clause in the report query section allowing it to receive the values set by a user.
Add where clause in the report query section using the created parameters. For using the values returned by the parameter, use the parameter name with $ sign and within {}. Syntax – ${parameter_name}.
For multi-select parameters, use IN keyword for comparison in the where clause as array is returned.
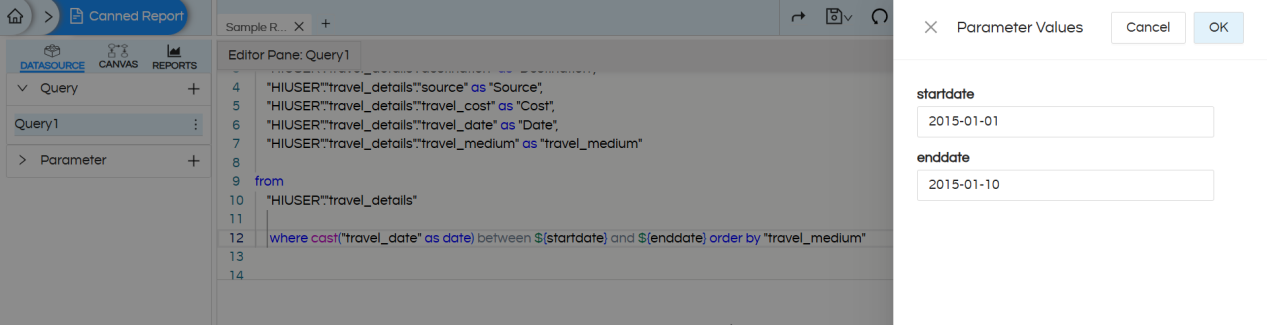
Save the query and execute it, you will get a parameter prompt as below there you need to provide some parameter value to validate SQL with dynamic parameter value.
Report SQL :
select
	"HIUSER"."travel_details"."travel_id" as "ID",
 	"HIUSER"."travel_details"."destination" as "Destination",
 	"HIUSER"."travel_details"."source" as "Source",
 	"HIUSER"."travel_details"."travel_cost" as "Cost",
 	"HIUSER"."travel_details"."travel_date" as "Date",
 	"HIUSER"."travel_details"."travel_medium" as "travel_medium"
from
	"HIUSER"."travel_details"
where cast("travel_date" as date) between ${startdate} and ${enddate} order by "travel_medium"
STEP 6: Parameter configuration (specifying the parameter type)
To configure the created parameters, navigate to CANVAS > Parameter, then expand the parameters section. This will display all the created parameters, which need to be configured individually.
In the configuration panel, you can specify options such as: selecting the input parameter type, mapping display value and key columns for a query-based drop-down list, defining date formats, setting a default value for the parameter and hiding the parameter if needed.

- Hide Filter: Hides the parameter from the UI but if the value is passed via report URL it can still be passed to the canned report. Read here to learn how to pass filter values from URL.
- Filter Type: Defines the type of input control (e.g., dropdown, text box, date picker). Read here to learn about each type.
- Default Value: When the report opens by default with what filter/input parameter value should it show the data that value has to be defined here.
- Multiple: Allows selecting multiple values if set to true, otherwise it allows to select only a single value only.
- Display: Column shown to the user in the dropdown.
- Value: Column whose value is passed to the query when selected.
In most of the cases, the Display and Value is the same. But in certain cases let’s say, we want to Display Employee_Name on the frontend for a user to select, whereas in the SQL where clause we want to pass Employee_ID, in those cases Display and Value field is useful.
Quotes: Controls whether the parameter value is wrapped in quotes in the query. Certain DB syntaxes might need a specific kind of quotes/syntaxes within which the filter values goes. That can be specified and used here.
In our case Filter Type is selected as Date. Also Default Value is specified.
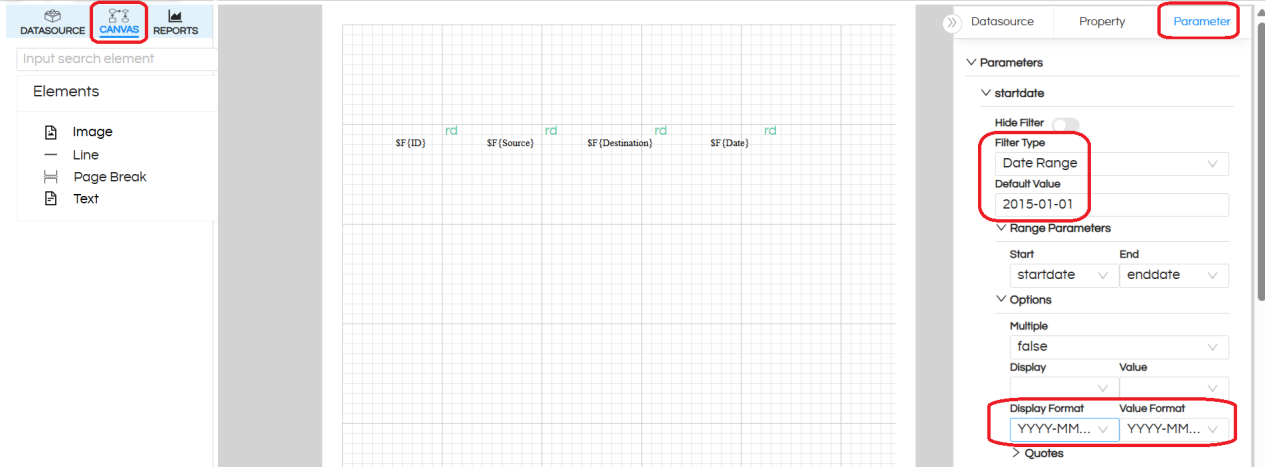
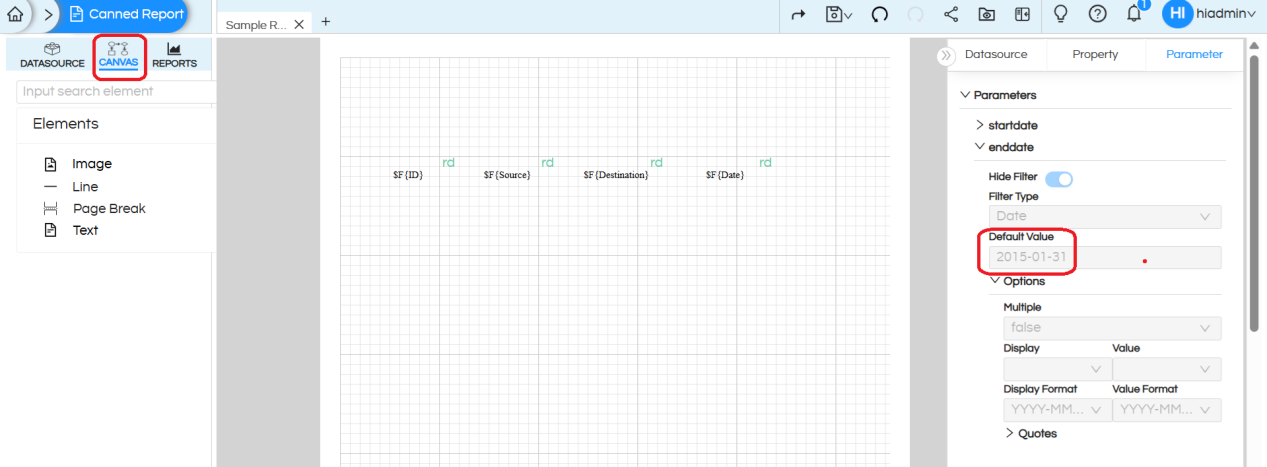
NOTE: In the first date of the date range (in our case StartDate) we choose Filter Type as Date Range.
For the second filter of date range (in our case EndDate), the date type is automatically set as Date.
We only provide configuration for the startdate filter only.
STEP 7: Save the report, open it in a window, and test the report with the parameter
Reach out on support@helicalinsight.com for any more questions You can also post your questions here : https://forum.helicalinsight.com/
