In this document, we are providing instructions of how to install Helical Insight via JAR/installer method in details
From version 6.0 onwards, we are also providing a docker method of installation which is most preferable. With the docker, you will get a production ready setup with all the required settings for performance and export and is the most preferred method of deployment and installation of Helical Insight.
- Docker method of installation of Helical Insight v 6.0 onwards read here : https://www.helicalinsight.com/helical-insight-version-5-0-support-for-docker/
- 2. If you are using a JAR method of installation, you can read this document further to learn how to do that.
Requirement:
- We recommend that the system has minimum 10 GB free space, 4 Cores and 8 GB RAM. Your actual production server hardware requirements will depend on the data size and concurrent users.
- You should have admin privileges before installing.
- No previous instance of Apache Tomcat should be running. Please stop any Tomcat instance if it is already running. The Helical Insight installer is having Apache Tomcat as a part of the installer itself by default.
- Please ensure that you have an active internet connection before proceeding with the Helical Insight installation.
- Internet connectivity is required only during installation for downloading and updating application components. Once the setup is completed application will run without internet connection.
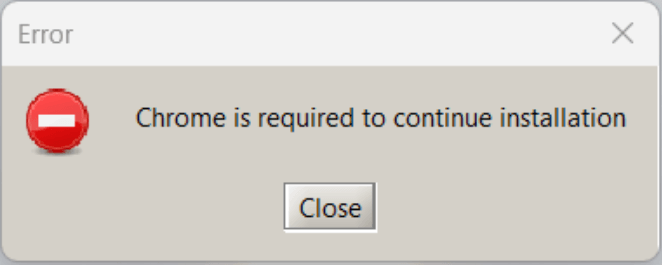
- Google Chrome browser. If you don’t have Google Chrome browser get it from https://www.google.com/chrome/
-
- Going forword from Helical Insight 5.0 GA installing Google Chrome would be a prerequisite as this enables eporting to pdf. If your system doesn’t have Google Chrome browser installed, Helical Insight setup will give following the error
-
- Java. If java is not installed, please refer to the below URLs for Java installation and environment variables configuration. Version 6.1 GA onwards (released in February 2026) we need Java 25, if you are on older version of Helical Insight then Java 21 or Java 11 is required based on your Helical Insight version.
Download Helical Insight executable and save it at your desired location.
Select the type of Operating System you use:
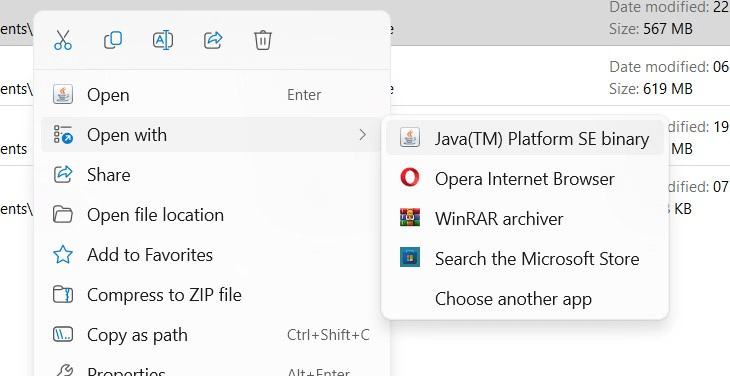
- Right click on the downloaded JAR File and open it with Java application as shown in the image.
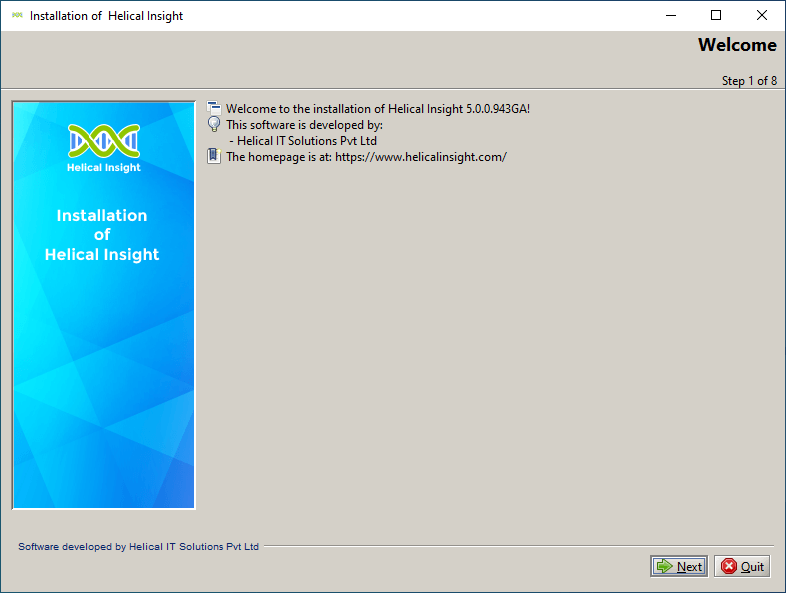
You will see the following Installer screen: - Click on Next. You will get the screen as below with the License Agreement.
- Click on “I agree the terms of this license agreement.” Click on Next You will get the following screen.
- Select the location where you want to install the application. Click on Next.
- Select the Port that you want to use and the name that you want to give to the application. Click on Next
- Verify the Installation details. Click on Next .
- Once the installation is done, click on Next .
- The application is successfully installed.
- Go to a Web Browser and type “your-path:port-number/application-name” in the address bar. For example, in this case, we will type “localhost:8085/hi-ee” in the address bar and we will get the following login screen:


Note: Please bear if installation is taking long time as it might be downloading and setting up application for you.
Other related blogs:
