In order to migrate the dashboard created in Helical Insight from one server to another server, the steps involved are creating data sources connection, metadata, reports, and the dashboard. We would be covering in details the step involved in migrating from source to target.
Below mentioned are the details of the source:
Source Server:
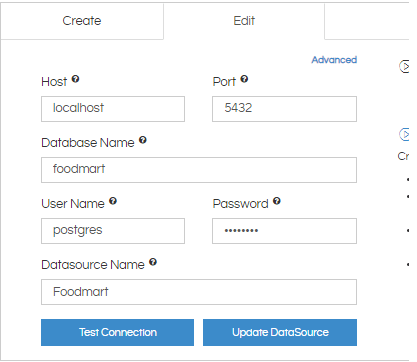
Data source connection: To establish a data source connection, click on “Data source” tab in home page and select whatever your database being used. For example, I am using “Postgres” so in order to create data source of “Postgres”click on the Icon of “Postgres”. Provide the IP address, port, database name, user name, password and Datasource Name details as shown in below image.
If you updated the data source, you will get one “GlobalID” connection as shown in below image.

The above connection details are saved in“globalConnections.xml”.
Path: “\Helical Insight\hi\hi-repository\System\Admin”
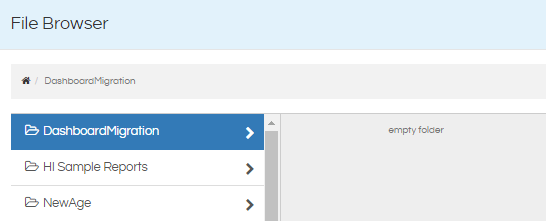
Metadata: In order to create metadata click on “Meta Data”on the home page, the window will be open in edit mode. The right side of the panel you can find the data source which you made in the above step. Select the required tables from the database and save it in where you want.For example, I saved metadata in below path shown in the image.
This metadata will be saved in the backend also. The path of the metadata file is
Path: “1560759730699/6f612ef2-7ce4-42aa-9afb-60d93e11e793.metadata”
Reports: To create reports from Helical Insight go to the home page and click on the “Reports” tab. If you click on Reports it will redirect to edit mode. Click on metadata and select where you saved in the above step and save the report with filters. For example, I saved the report in below path.
From UI “DashbaordMigration/EmployeeTravelDetails”

From backend “1560759730699/e42af83e-6862-4b8e-8821-7915e1c878a6.report”
Dashboard: In order to create dashboard we need reports. In the above step, you created 2 reports with the filter so select those reports to “Dashboard Designer”and add filters. Save it in the same location where you saved the reports.
For example
From UI “DashbaordMigration/Dashboard”
From backend “1560759730699/ca167bdf-e274-4b71-8827-3648232a9b31.report”
TARGET SERVER DETAILS
Target Server: Migrations consists of “Data Source”, “Metadata”, “Reports and “Dashboard”
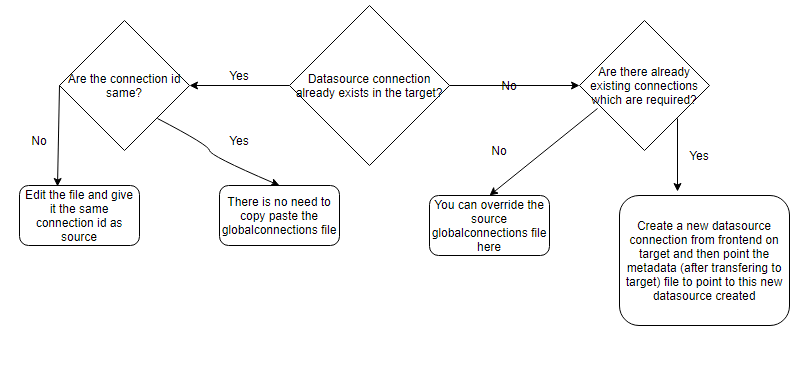
Step1 Data source Migration: In order to migrate the data source please refer below image.
Step2 Meta Data Migration: In order to migrate the metadata copy the metadata file from source to target in the same folder or any folder.
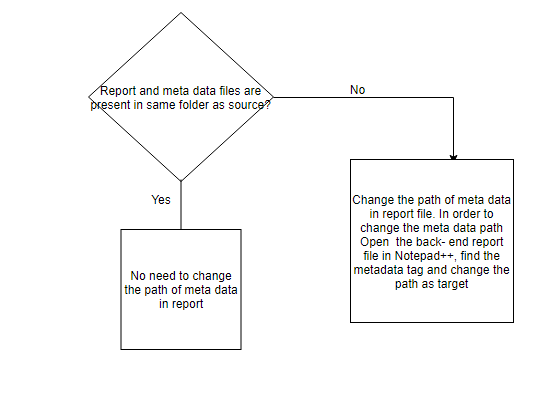
Step3: Report Migration: In order to migrate the reports please refer the below image.
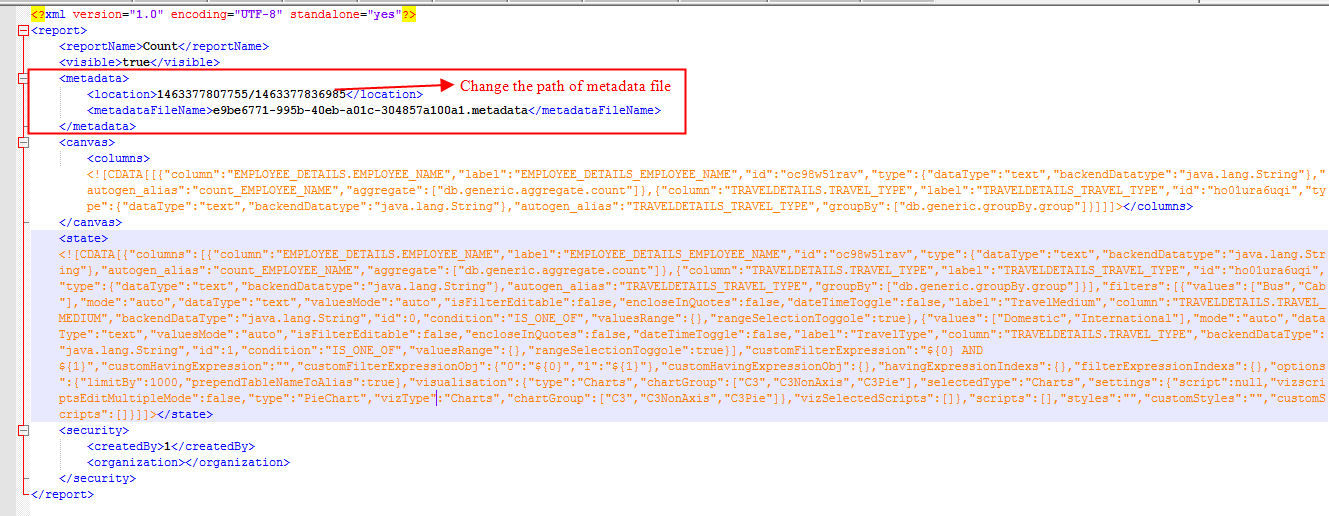
Step4 Dashboard Migration: In order to migrate the dashboard you need to copy .efw, .efwdd, .html and index.efwfolder along with the reports from source to target.
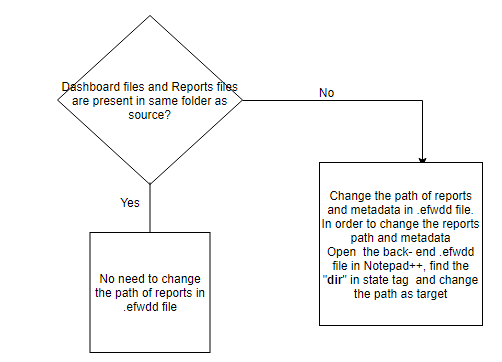
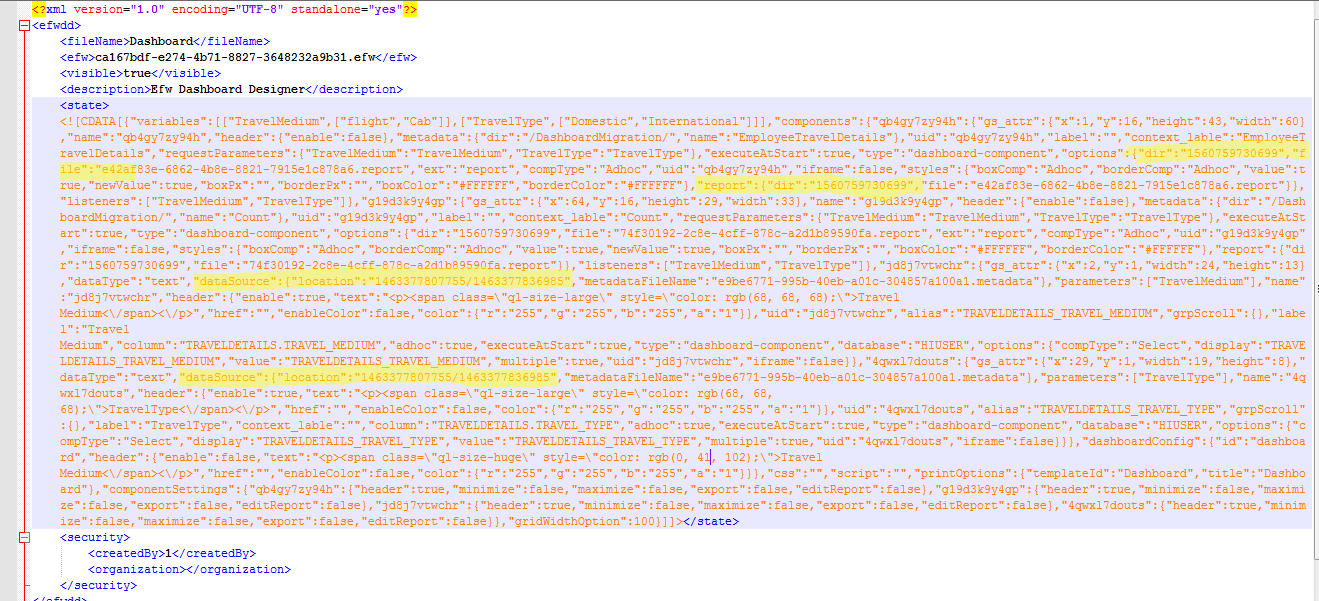
Step 5 Images Migration: In your report or dashboard you might have used certain images.
As a best practice, you should always have a dedicated folder for images wherein you are saving all the images being used. While migrating the solution from source to target please migrate this folder also.
Aside if you open the dashboard designer EFWDD file from the backend you will see a component called “image”. Within that, there is something called “src” which has got the exact path of the image file. You can refer to the below image to understand the same (highlighted).
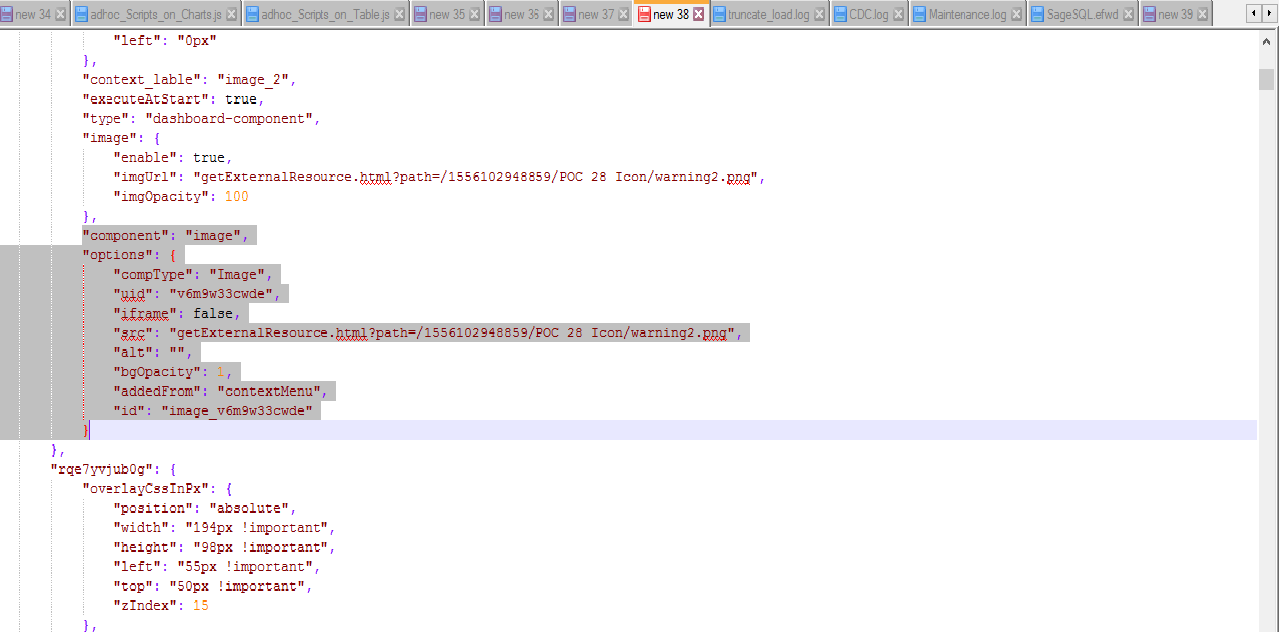
Step 6 VF files Migration: You might have integrated external VF files for more visualization options.
As a best practice, you should always have a dedicated folder for images wherein you are saving all the VF files being used. While migrating the solution from source to target please migrate this folder also.
COMPONENTS
In the dashboard designer file EFWDD, you can open it using any text editor.
Below mentioned are various components which can be present in the dashboard created from frontend and how you can identify it.
- Adhoc Reports:
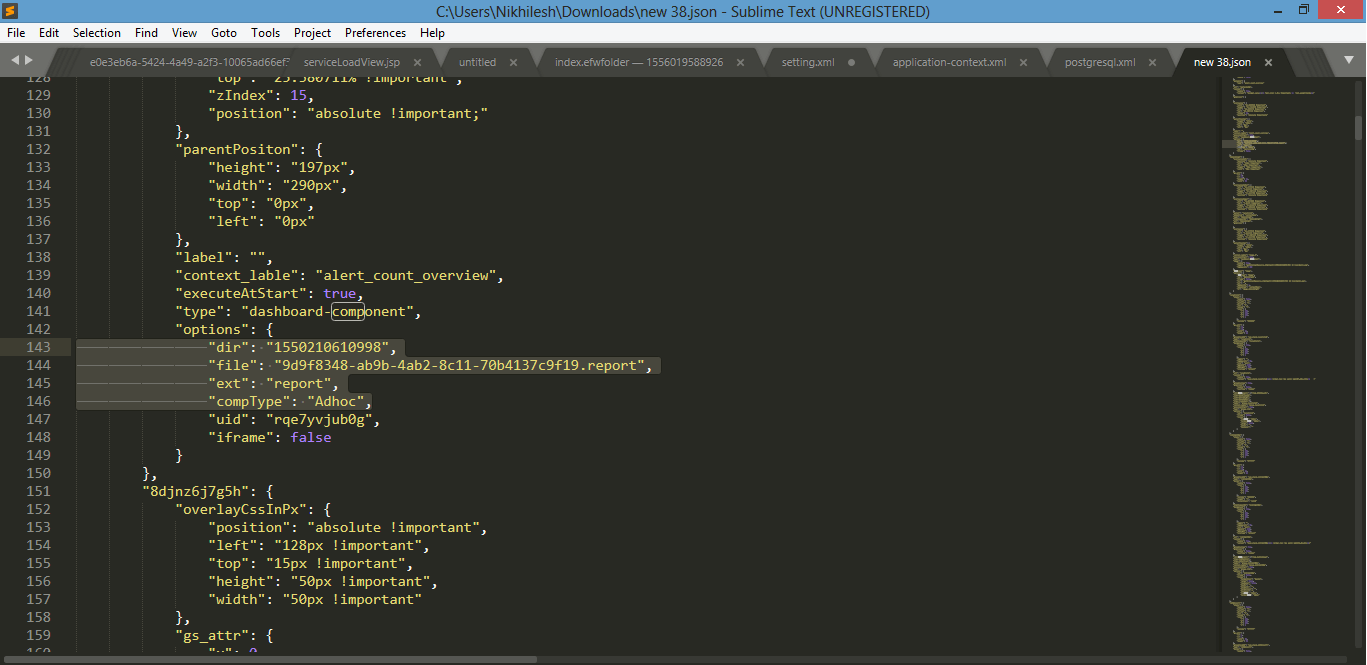
If you search by the “comptype” all the ad-hoc reports are generally present by the name “report”.
Also, it has something called “dir” which is a directory where this file is present and “file” tag which has the actual filename. - Input parameters:
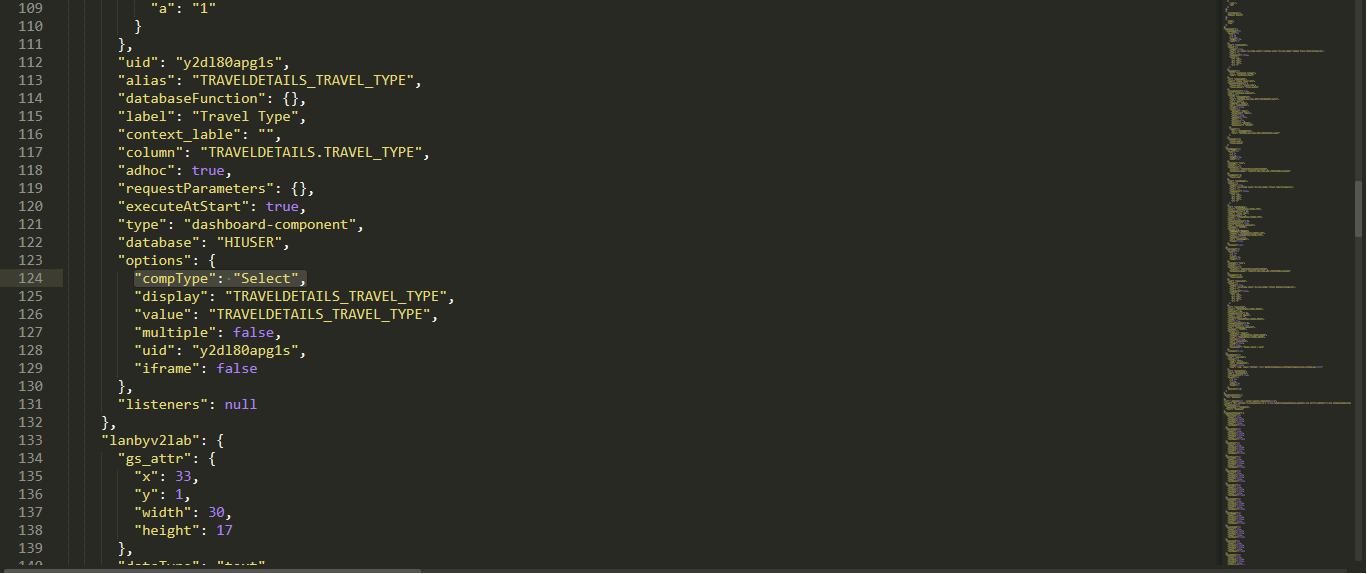
If you search by the “comptype” all the various input parameters information are generally present by the name “select / select 2 / datepicker /daterangepicker / slider”. - Images:
If you search by the “comptype” all the images are generally present by the name “Image”.
Also, it has something called “src” where in which in getExternalResource we can find the exact path where the image is saved. - Text box:
If you search by the “comptype” all the text boxes information are generally present by the name “Text”.
Below that it has information about the content present, formatting of those texts, etc. There is no separate effort which is required in order to migrate the text box content.
You can refer to the below image for the reference.
There is no separate effort which is required in order to migrate the input parameters.
You can refer to the below image for the reference.

Thank You
In case if you have any queries please get us at support@helicalinsight.com
