
This article explains how to email and schedule reports/dashboards.
Steps to Email or Schedule a Report
- Login and open the report/dashboard you want to send.
-
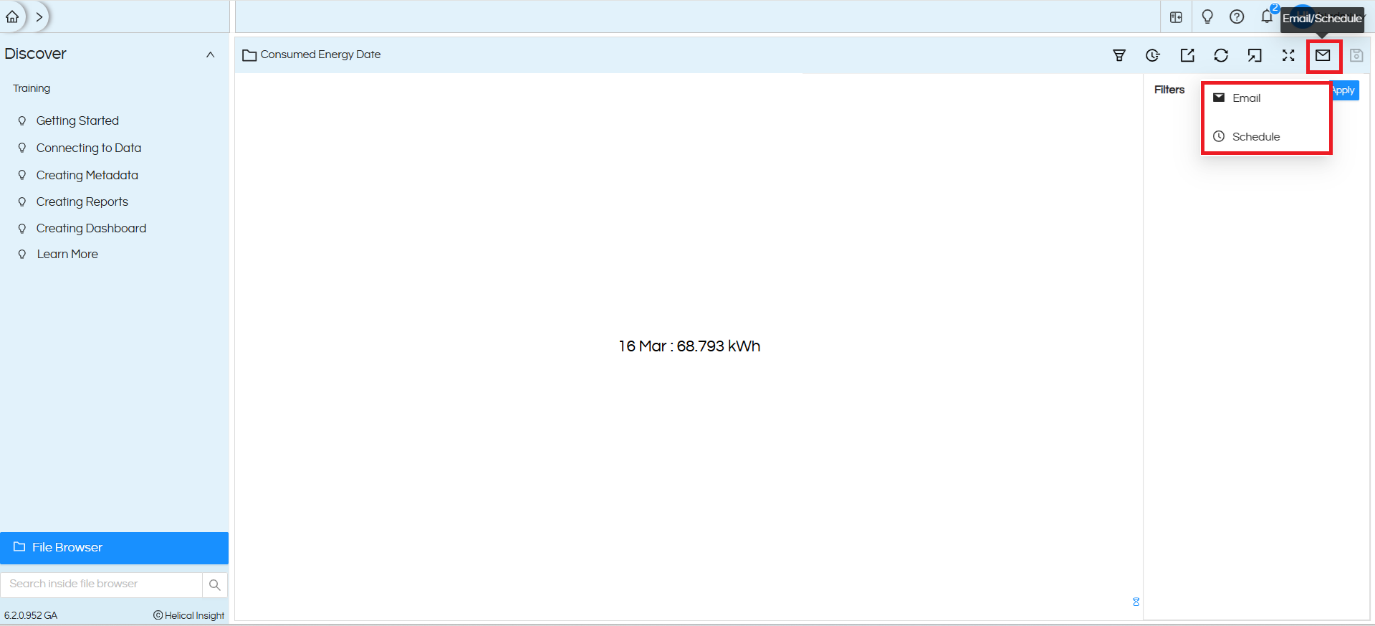
Click on the Mail icon, which provides two options:
- Email → Send the report immediately
- Schedule → Set up automated email delivery
Email Report
When you select Email, the report is sent instantly.
The first screen (Parameter Review) shows the currently selected report parameters.
Click Next to proceed.
On the next screen, you can:
- Enter recipient email IDs
- Add Subject and Body
- Select report Formats (via dropdown)
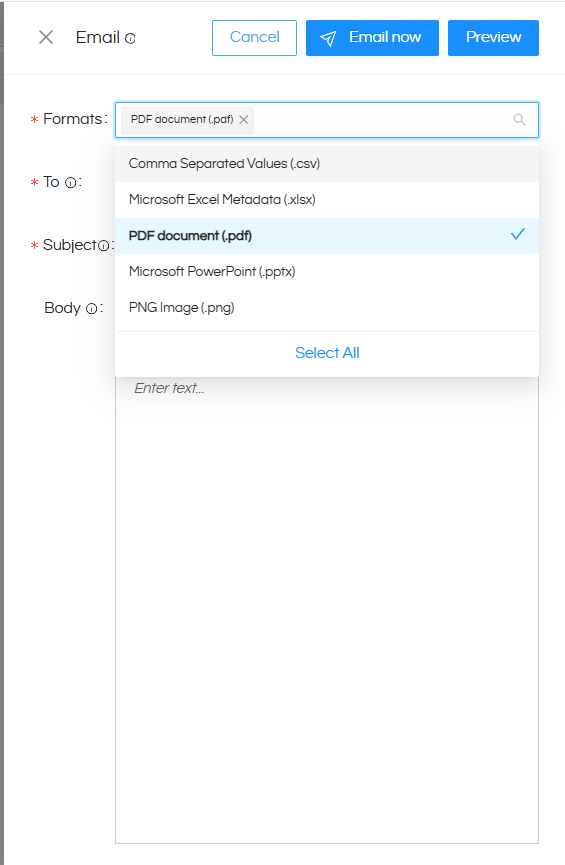
In the latest version, format selection is available through a dropdown multi-select UI (replacing the older checkbox-based selection).
Users can select one or more formats from the dropdown.
Selected formats will appear inside the field.
Available Formats:
- PDF document (.pdf)
- PNG Image (.png)
- JPG Image (.jpg)
- CSV (.csv)*
- Excel (.xlsx)*
Format Availability by Report Type
Schedule Report
Selecting Schedule allows you to automate report delivery.
Steps:
- Review parameters in Parameter Review
-
Enter:
- Email ID(s)
- Subject
- Email body
- Select formats (via dropdown)
Save Scheduled Report
- Choose a location to save the scheduled report
- Provide a name for the schedule
This creates a Saved Result file
A Saved Result stores the output of the report for selected parameters and sends it at defined intervals.
Scheduling Options
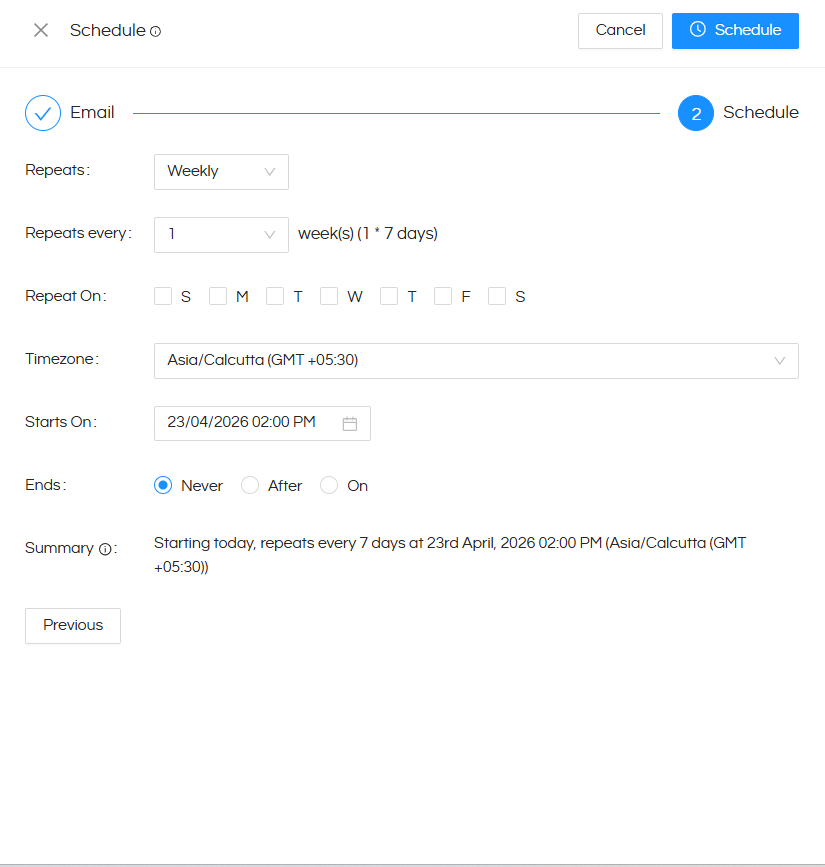
In the scheduling window, configure:
- Frequency: Daily / Weekly / Monthly / Yearly
- Time zone
- Start date and End date
